New Year = New motivation to learn new skills. Since I'm all about getting-back-to-basics, I thought I'd take my cooking skills to the next level and dry some Dutch Oven cooking.
Lucky for me, my sweet sister-in-law has done tons of Civil War reenacting and learned from very skilled ladies how to cook meals on an open fire. Having this wealth of of information right in the family was ideal for my venture of learning to use my Dutch Oven.
PS TIP
If you have a family member or friend with a unique skill, take the time to learn it! Chances are they will be more than glad to share. This is how I learned to knit originally. Just ask! Instead of paying for a class or online tutorial, just ask someone who already knows!
Think of the possibilities!
Learn to spin yarn, make soap, plant an herb garden, take film photographs, hand quilt a blanket...the list is quite endless.
This is also a great way to start, build, or maintain relationships. Showing someone you respect their skill in an area you know very little or nothing can go a long way. Take a humble pill, admit you aren't an expert at everything and revel in the freedom of learning!
Here are the simple steps that led to scrumptious, fire cooked rolls. Ours took approximately an hour to cook.
Any roll recipe will work. This is the one my sis-in-law whipped up while I held her baby being a shameless Auntie. I do not apologize.
Follow your recipe instructions up to the part where you shape the rolls. Don't put them in a pan, put them in the Dutch oven to rise. Once risen, put the lid on and head for the fire.
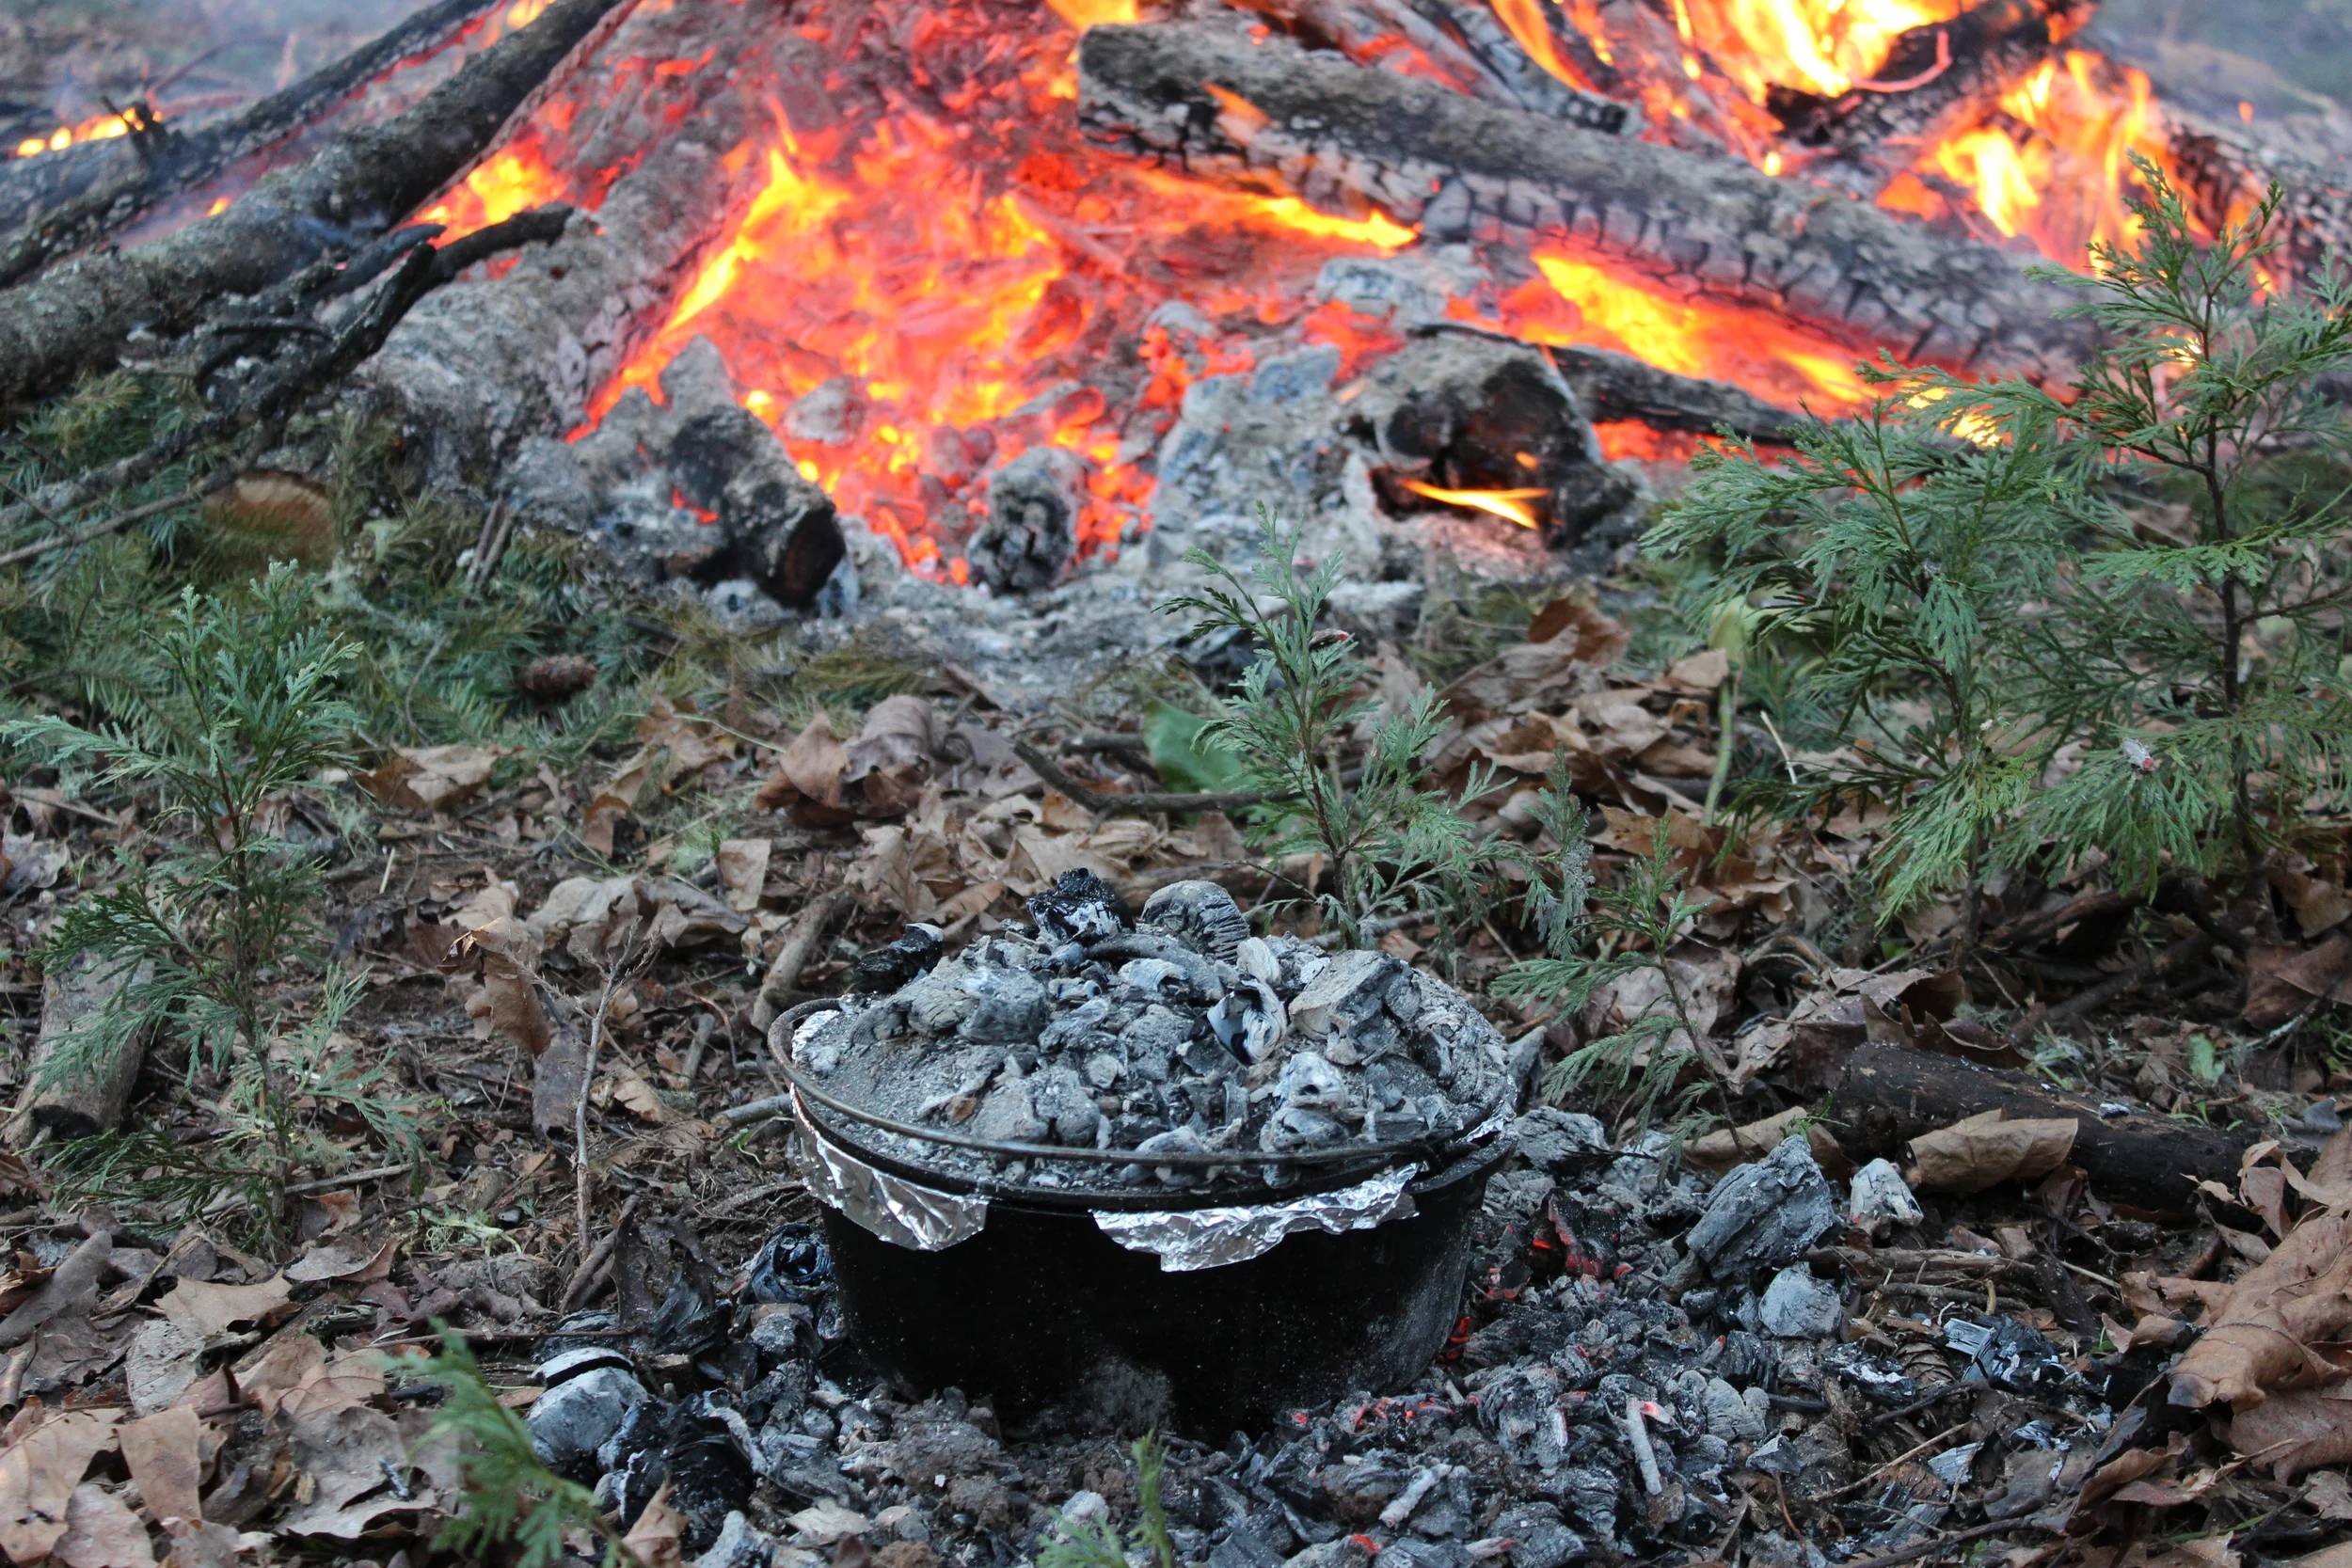
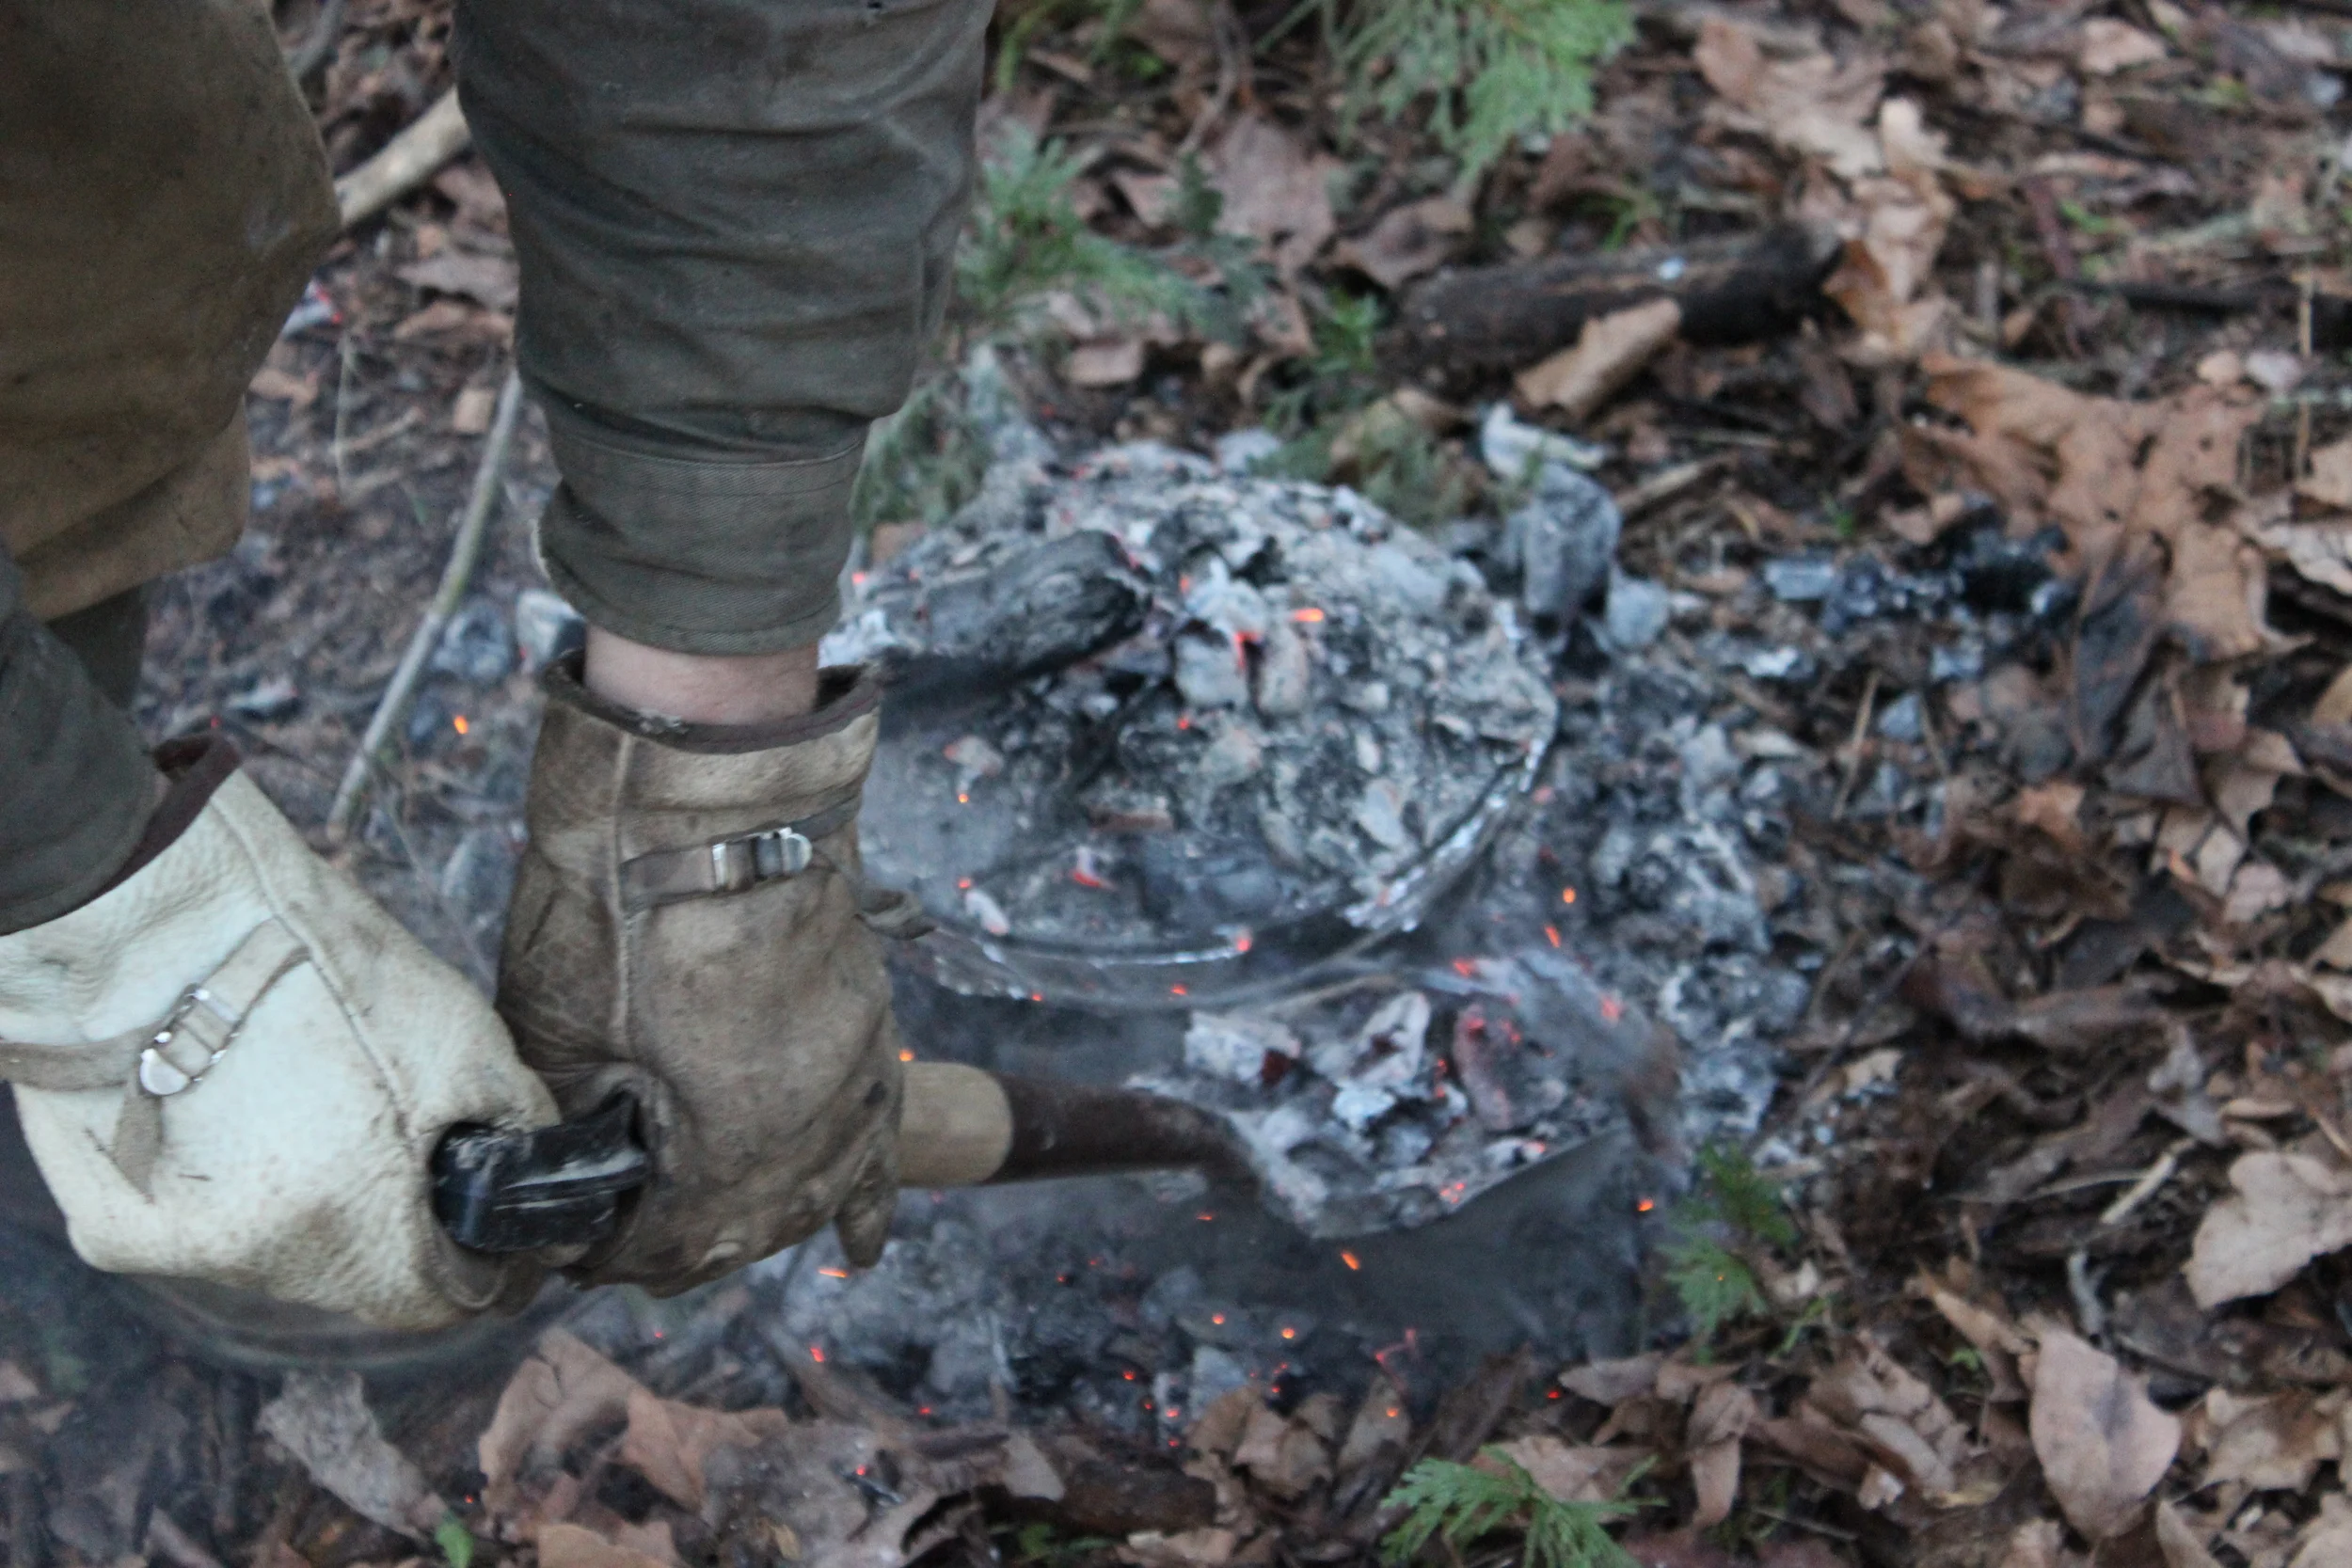
1} Make a bed of coals.
This is done by having a medium to large fire, letting it burn down, and harvesting the coals. My helpful brother took three shovel scoops full of hot coals and made a "bed" about 5 feet away from the main fire. The coals were chopped up on a flat spot and allowed to cool for a few minutes so they were not glowing red. Red is too hot and ABSOLUTELY NO OPEN FLAME! Flames will scorch your dish. No fuego.
Okay so we made the bed - Check
Evenly spread coals around the edges {Not touching the side...just radiating heat} - Check
One scoop on the lid spread evenly around - Check
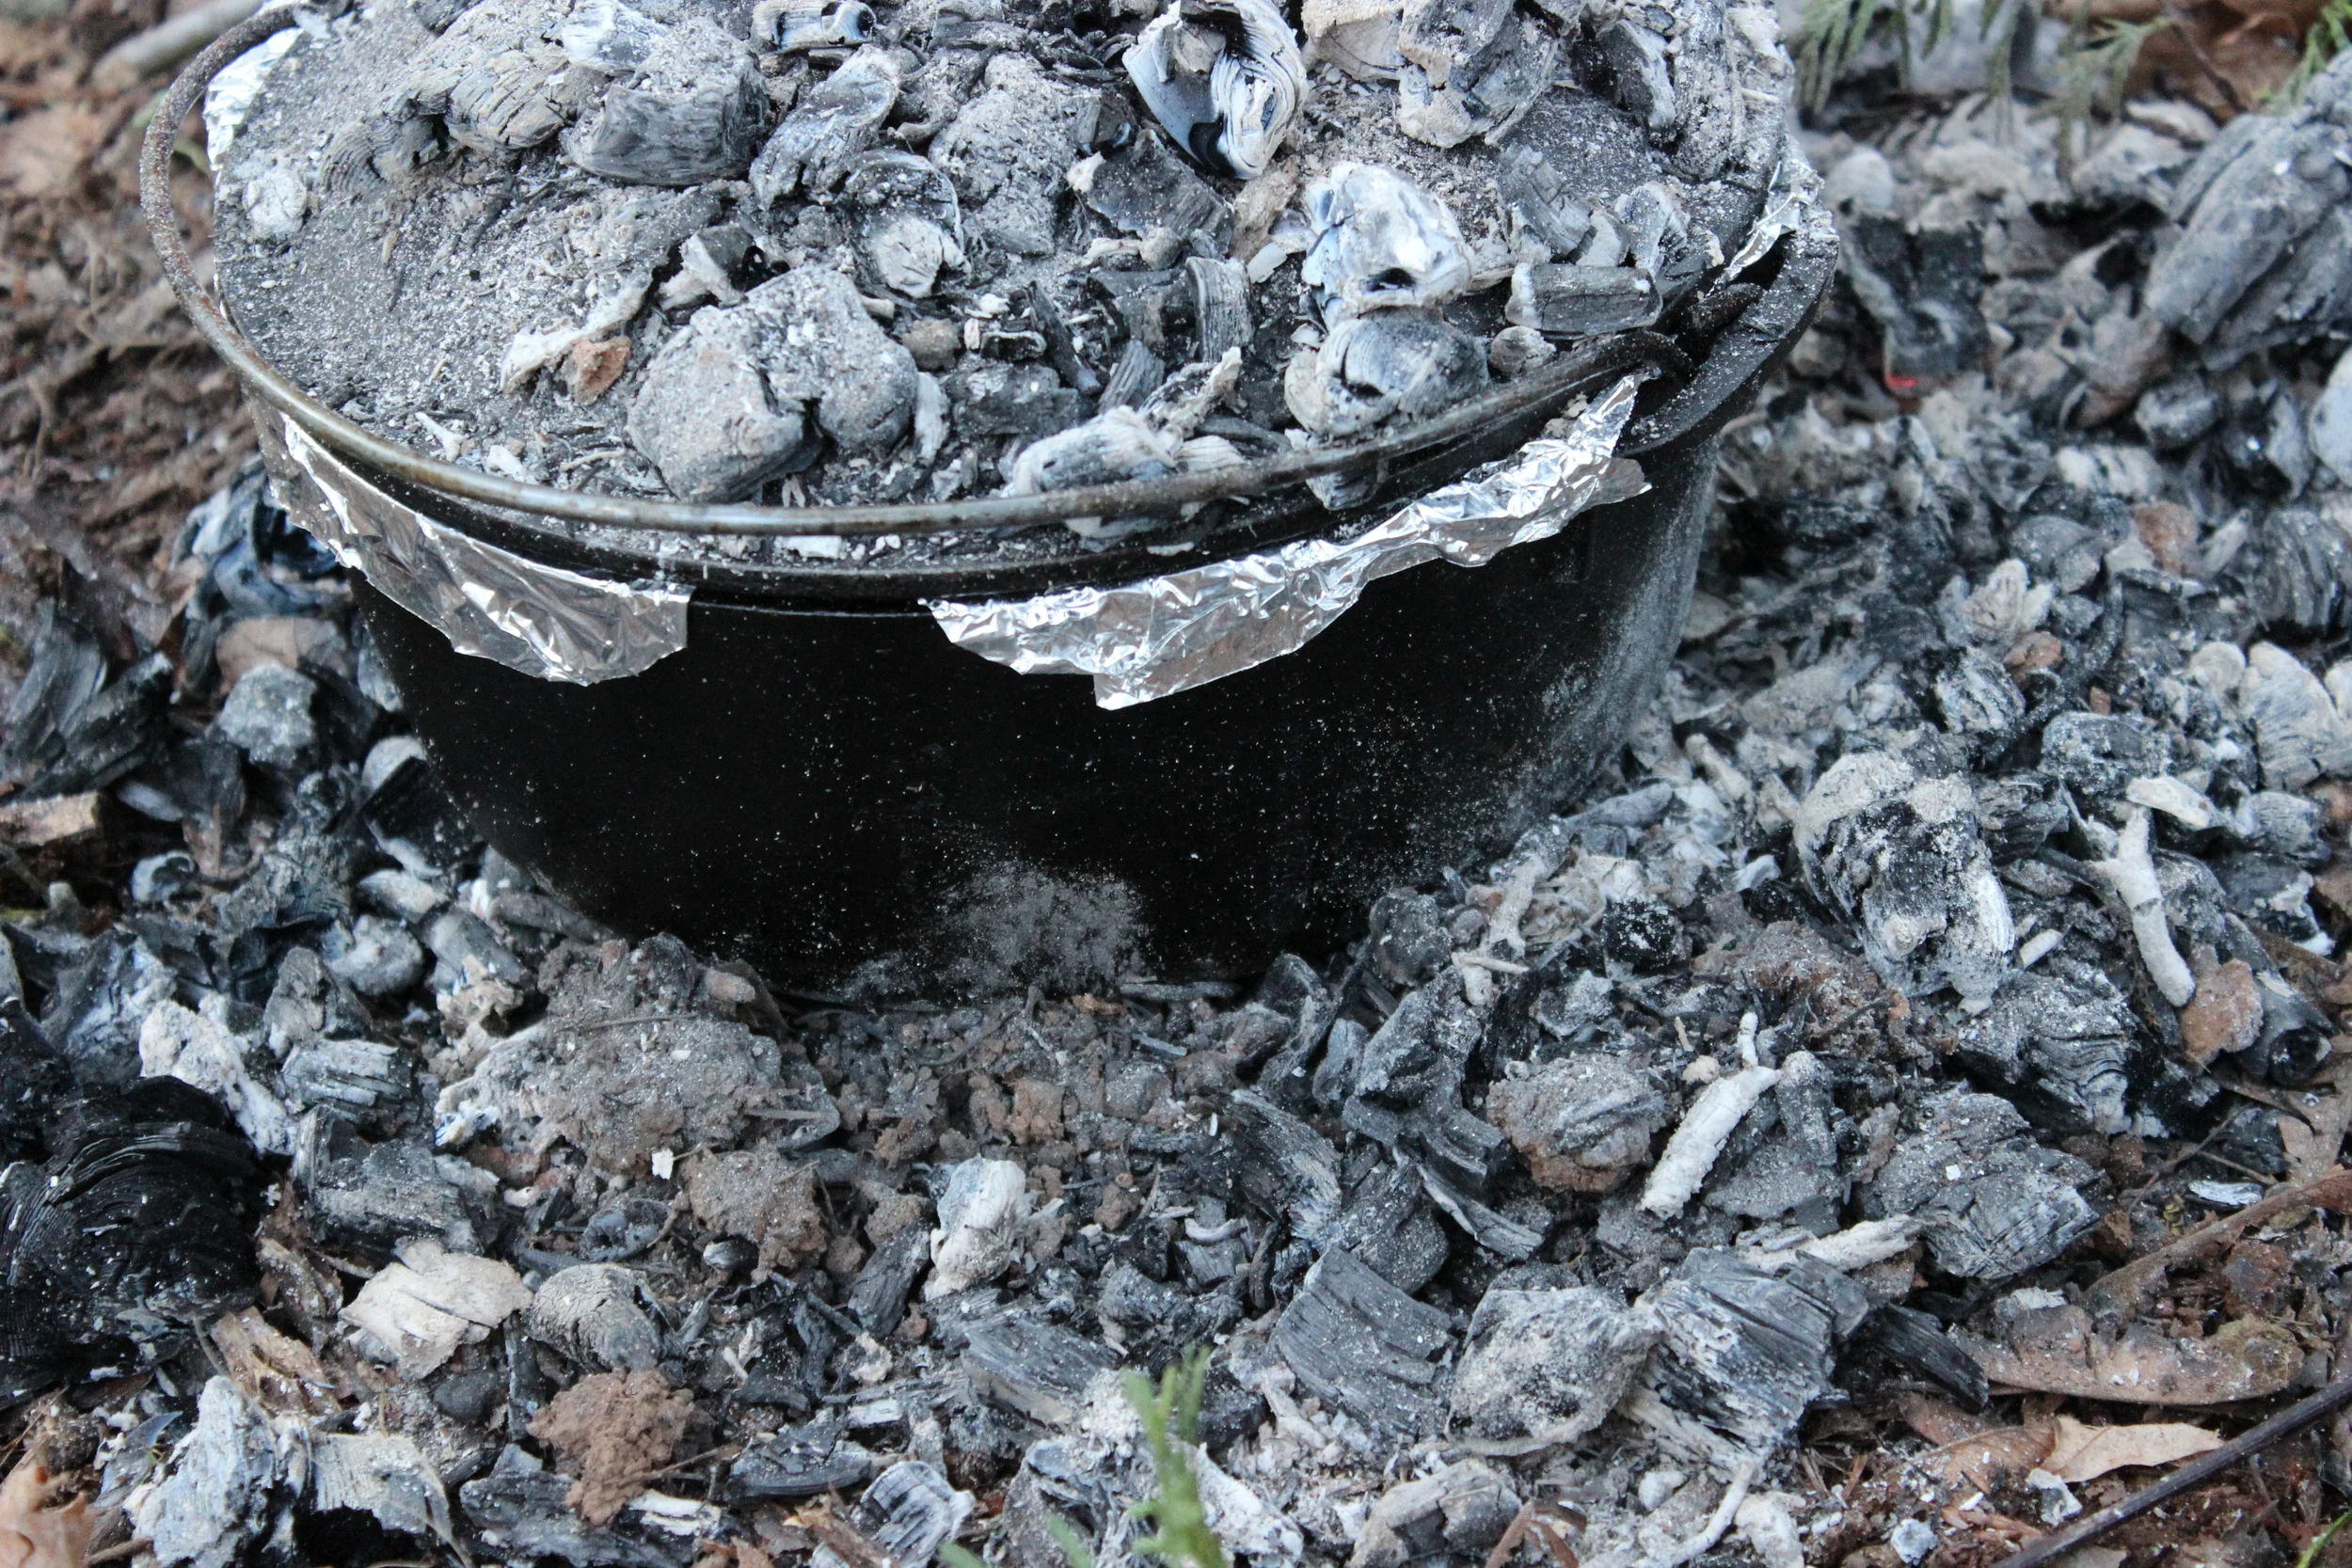
2} Tend the fire
You know in historical books or fiction about pioneers when they say "the women tended the fire". That wasn't just oh-let-me-pitch-another-log-on-the-fire-so-it-doesn't-go-out. No, that was a careful and continuous shuffling of coals around to create an even heat source to cook an entire meal. While they had children to care for, mending to do, churning, meat processing for winter, gardens to tend...women we do not have it hard today. We have it easy. No matter how tough you think you've got it...it could be a much much harder life.
Rant over
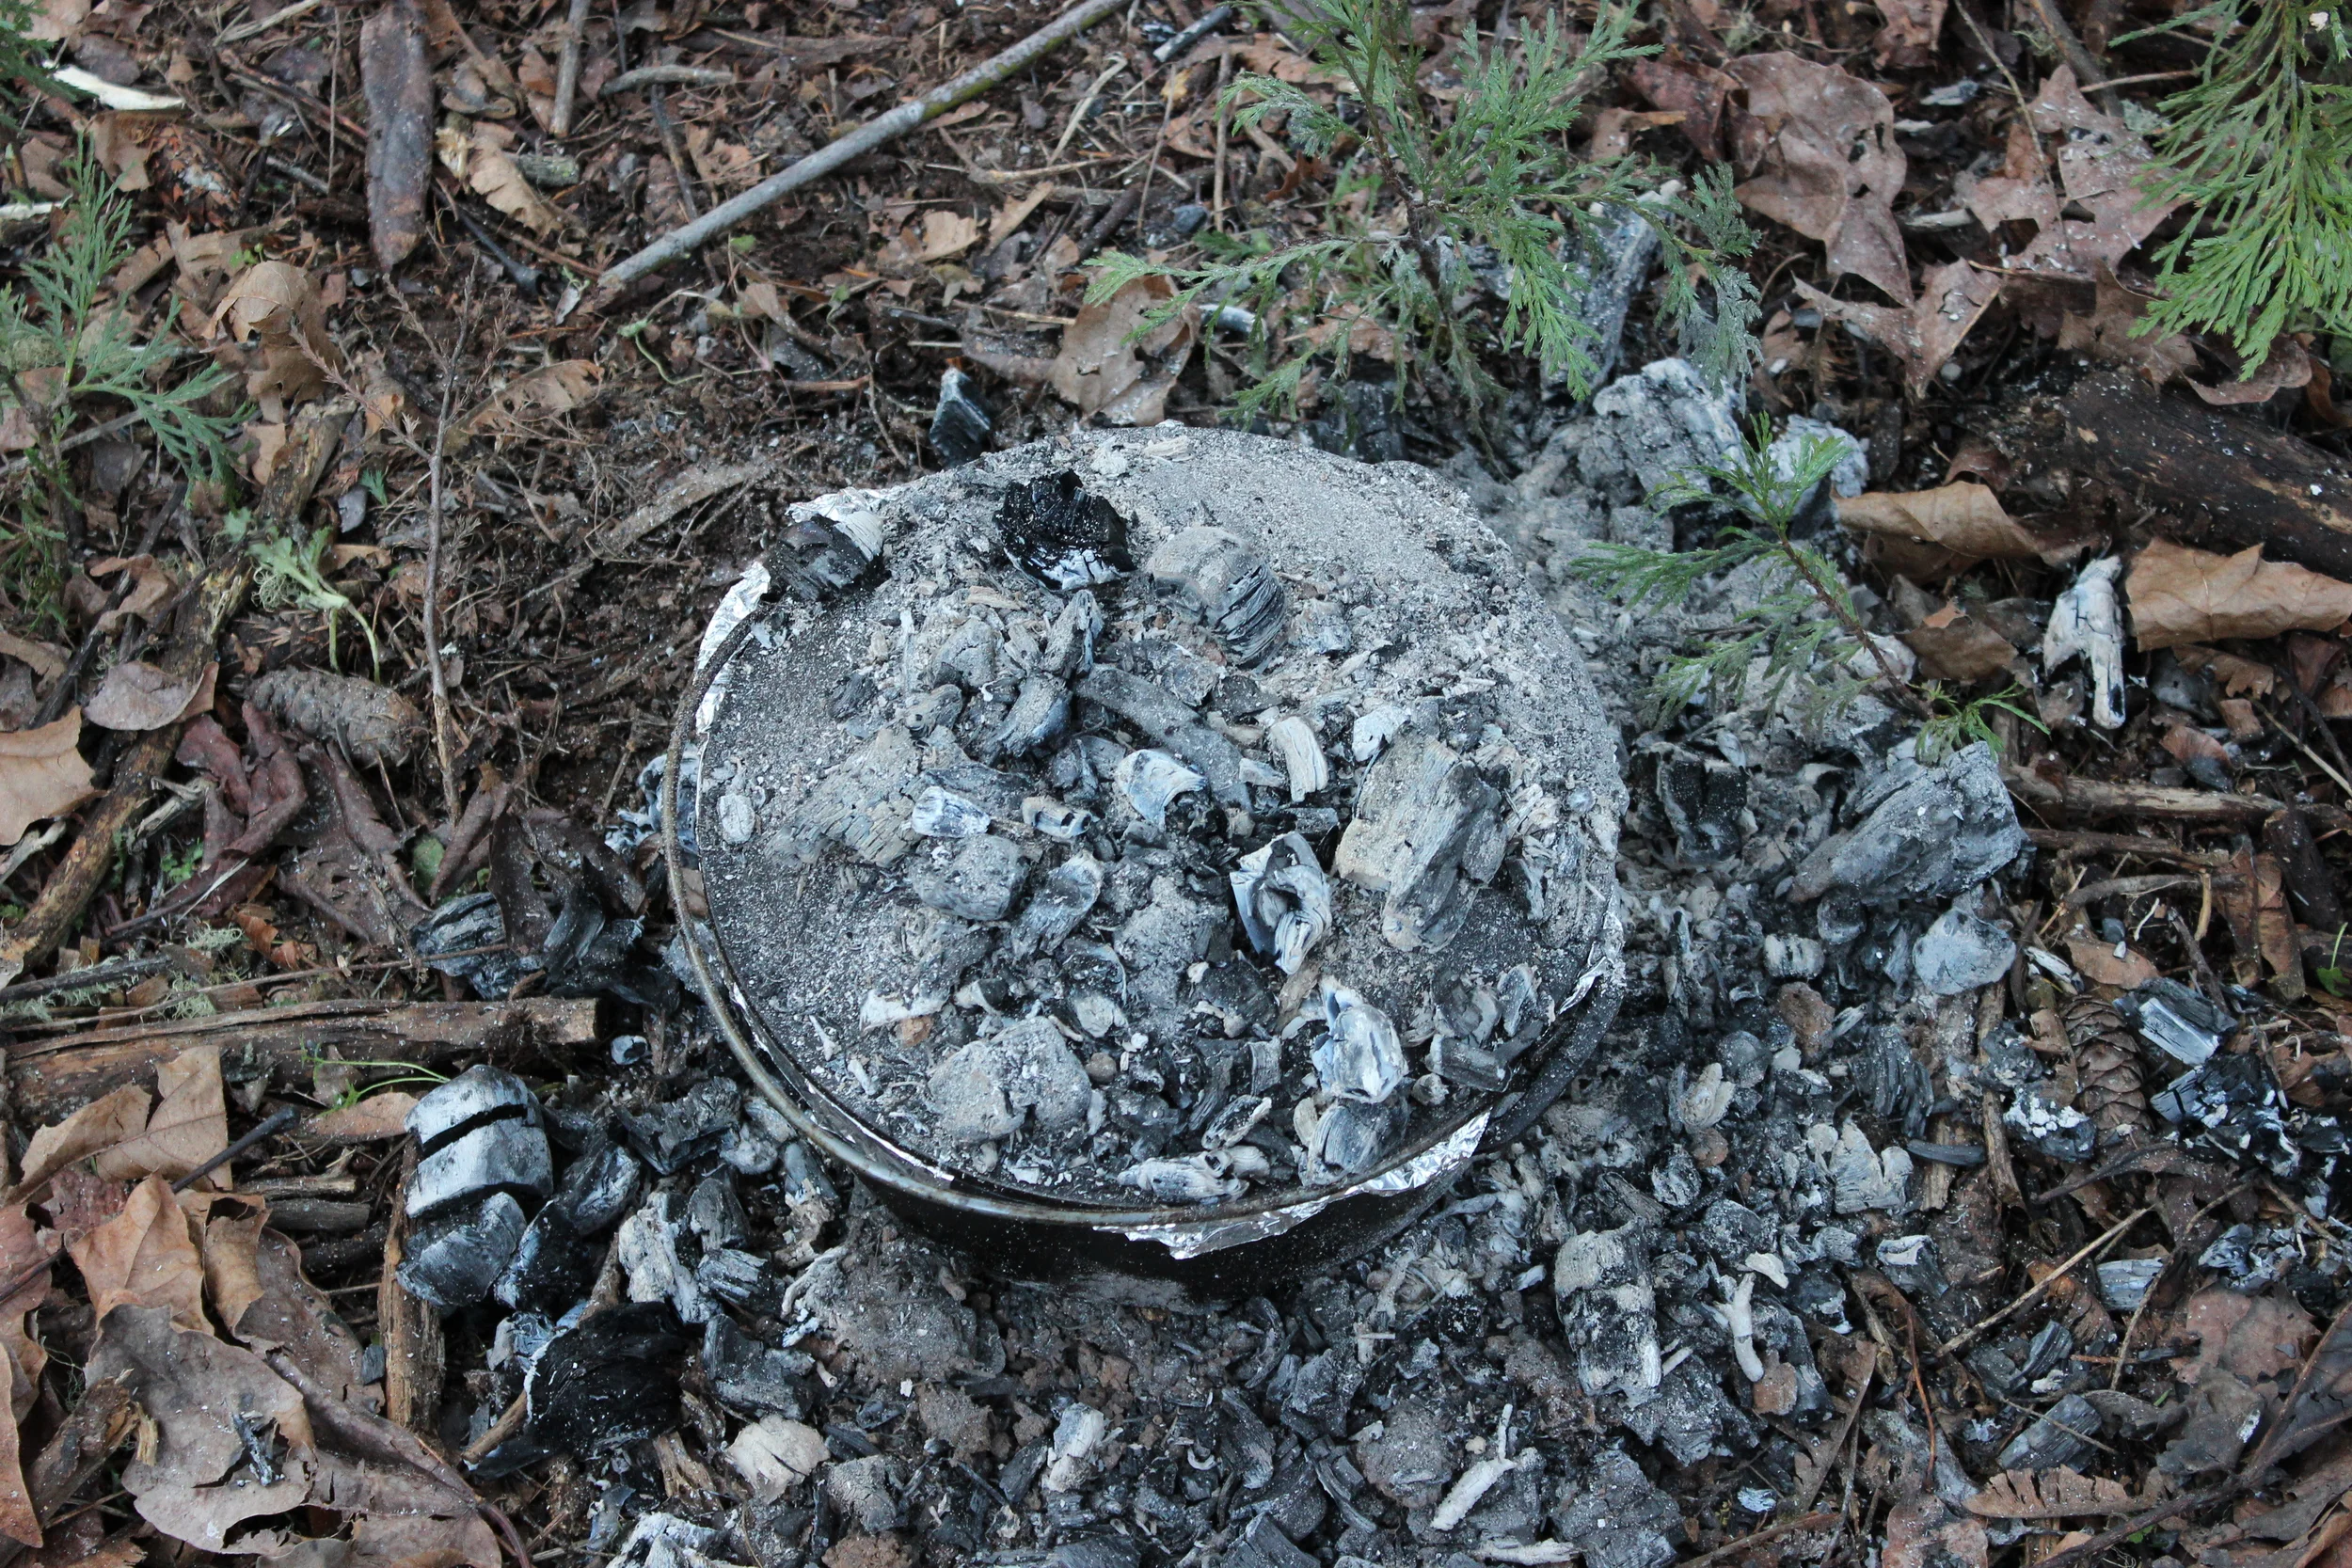
So every 10-15 minutes I stuck my hand down by the sides of the Dutch Oven to make sure there weren't hot spots and cool spots and then shifted {or had my trusty brother shift} the coals around, sometimes adding to, sometimes backing some off. Around every 20 minutes we added another scoop on the lid as the old coals died down. Again...don't get over zealous and heap red hot coals all over. Slow and even radiant heat is the goal.
3} Check the Progress.
Alright, listen up. The whole point of the Dutch Oven is to trap the heat and cook your rolls {or whatever dish you chose} like a regular convection oven. Lifting the lid every 10 minutes to see the progress only lets all the heat out from the top so you'll have done edges and soft middles. It's like trying to cook a turkey with the door open. Don't over do the checking!
Granted, it is kind of a guessing game, but wait until the rolls have been cooking long enough that you think they are close to done. Scrape the coals off of the lid, blow all the dust off, and using a hook {or bent stick as in my case} lift the lid a tiny bit to inspect.
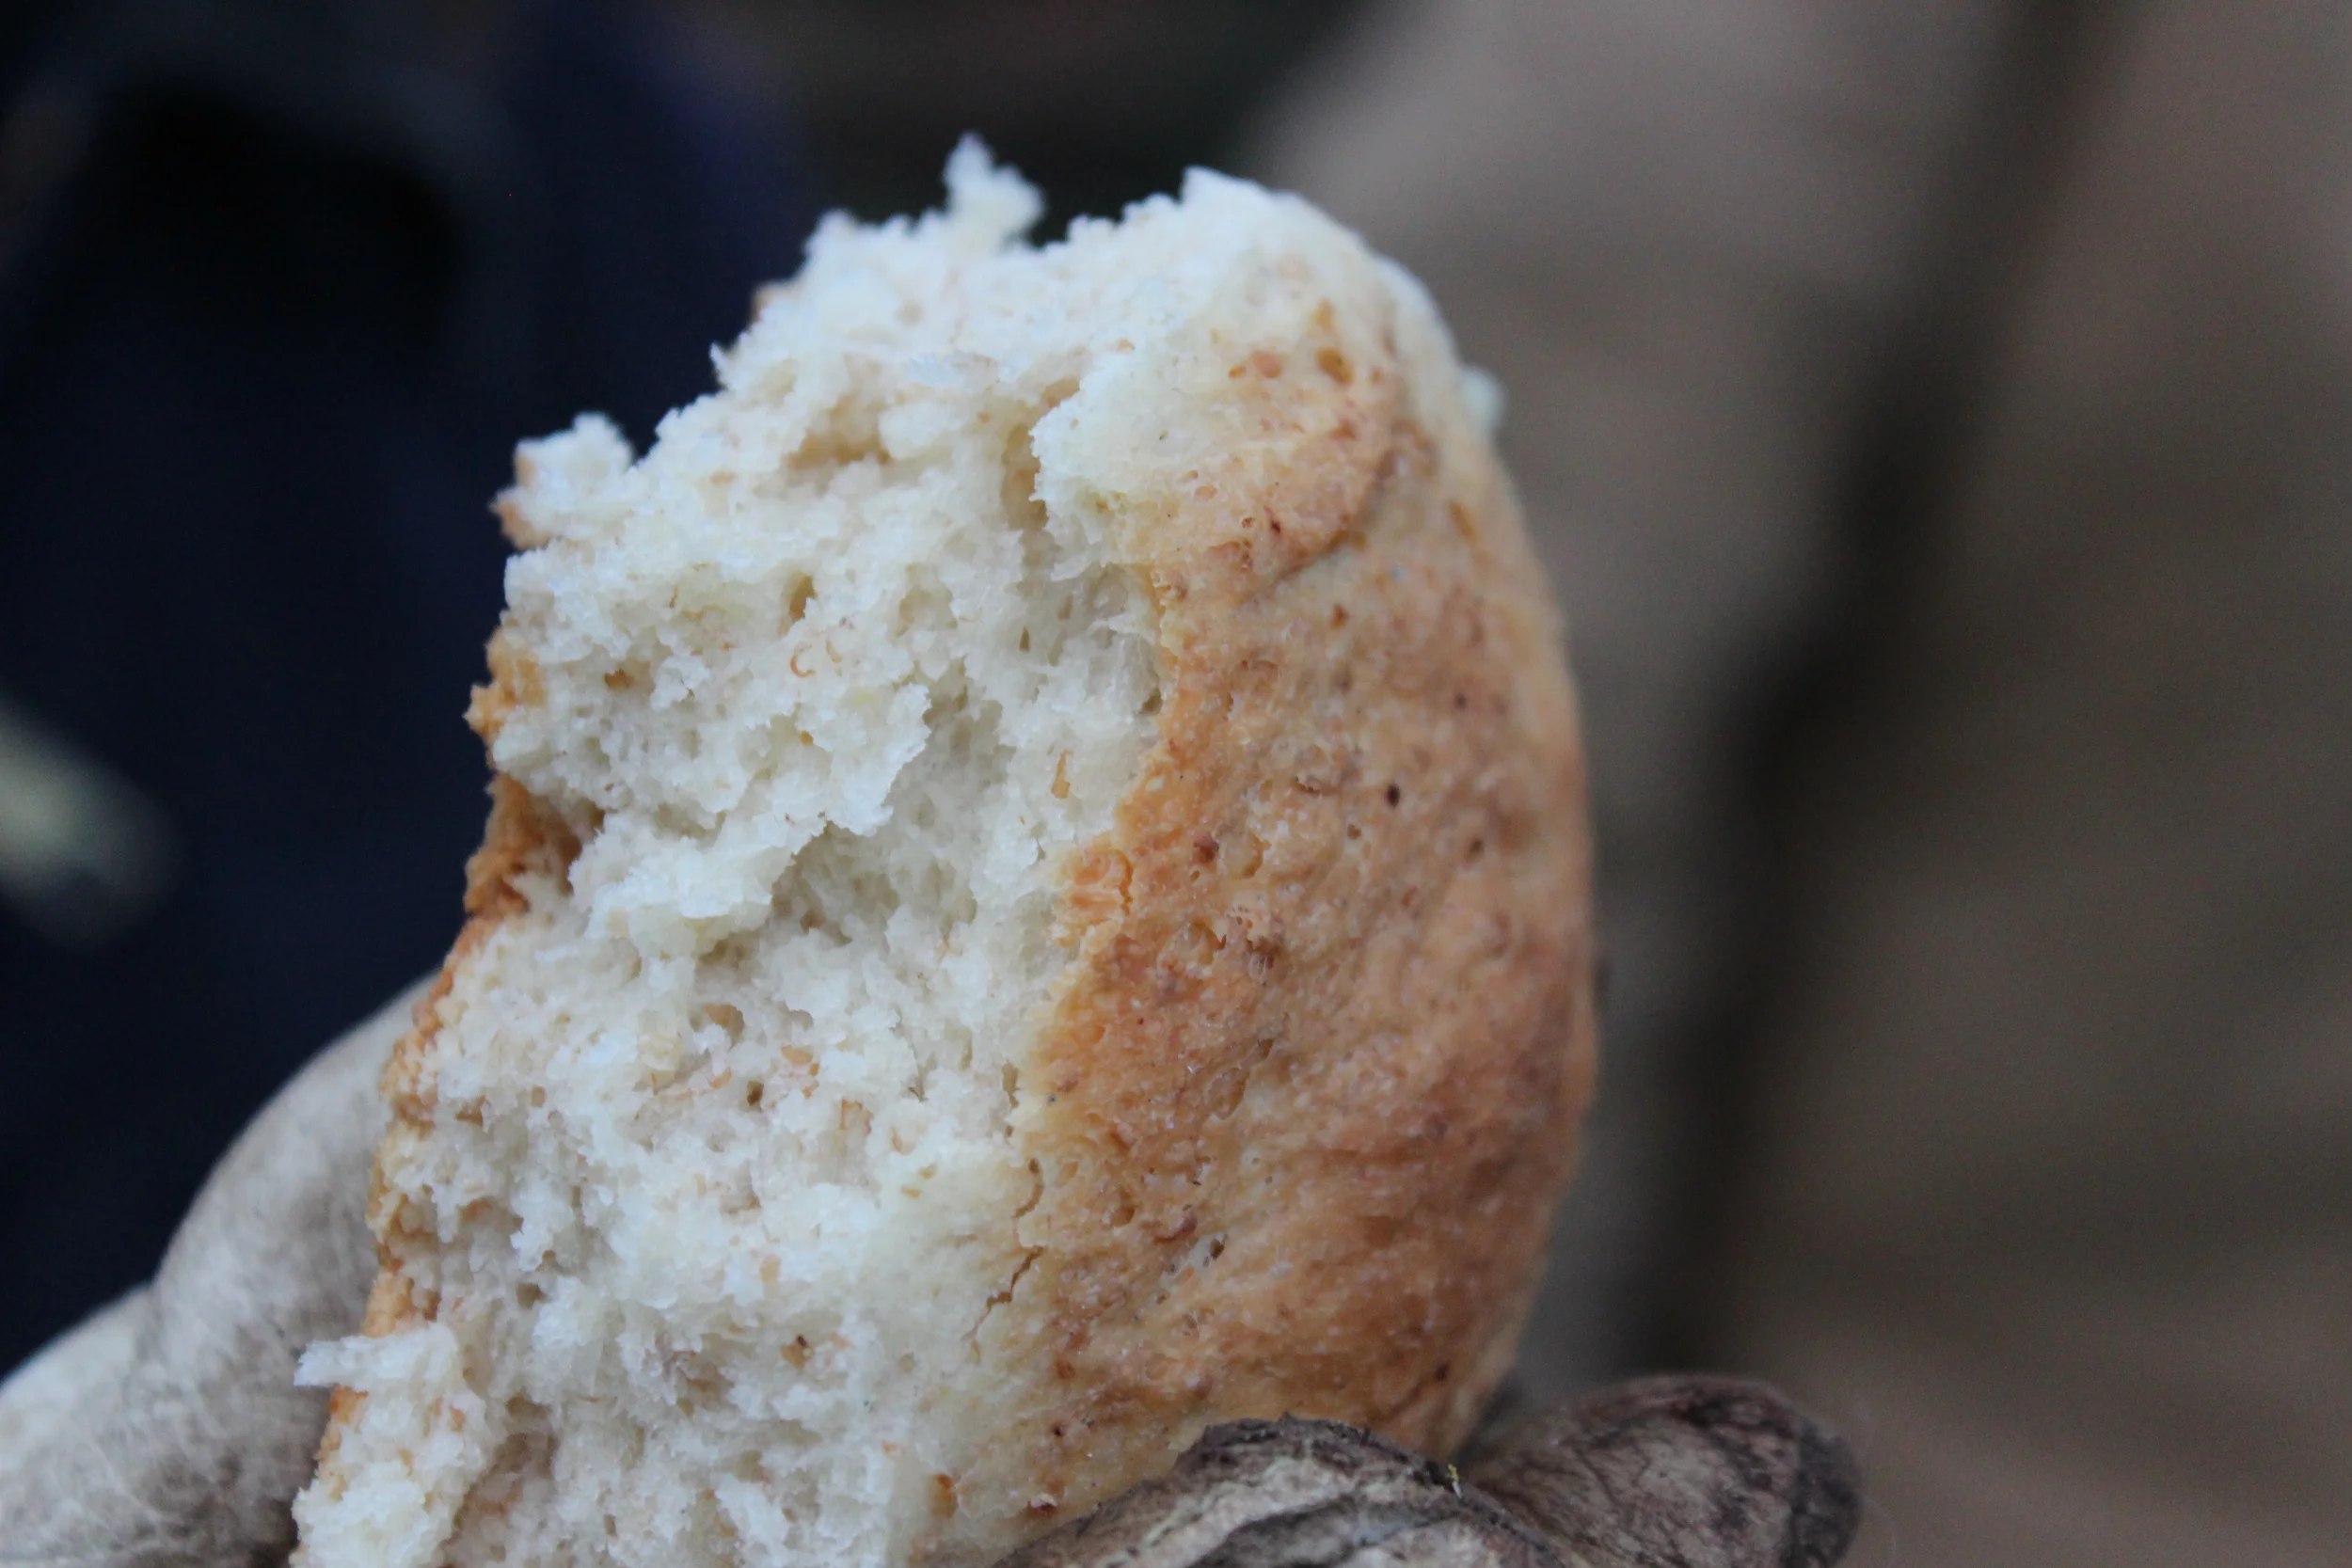
My rolls were brown on the edges and one side was starting to scorch but the tops of the rolls looked doughy. I pulled the coals back from the edges and added a heaping scoop of coals to the lid.
10 minutes later they were done!
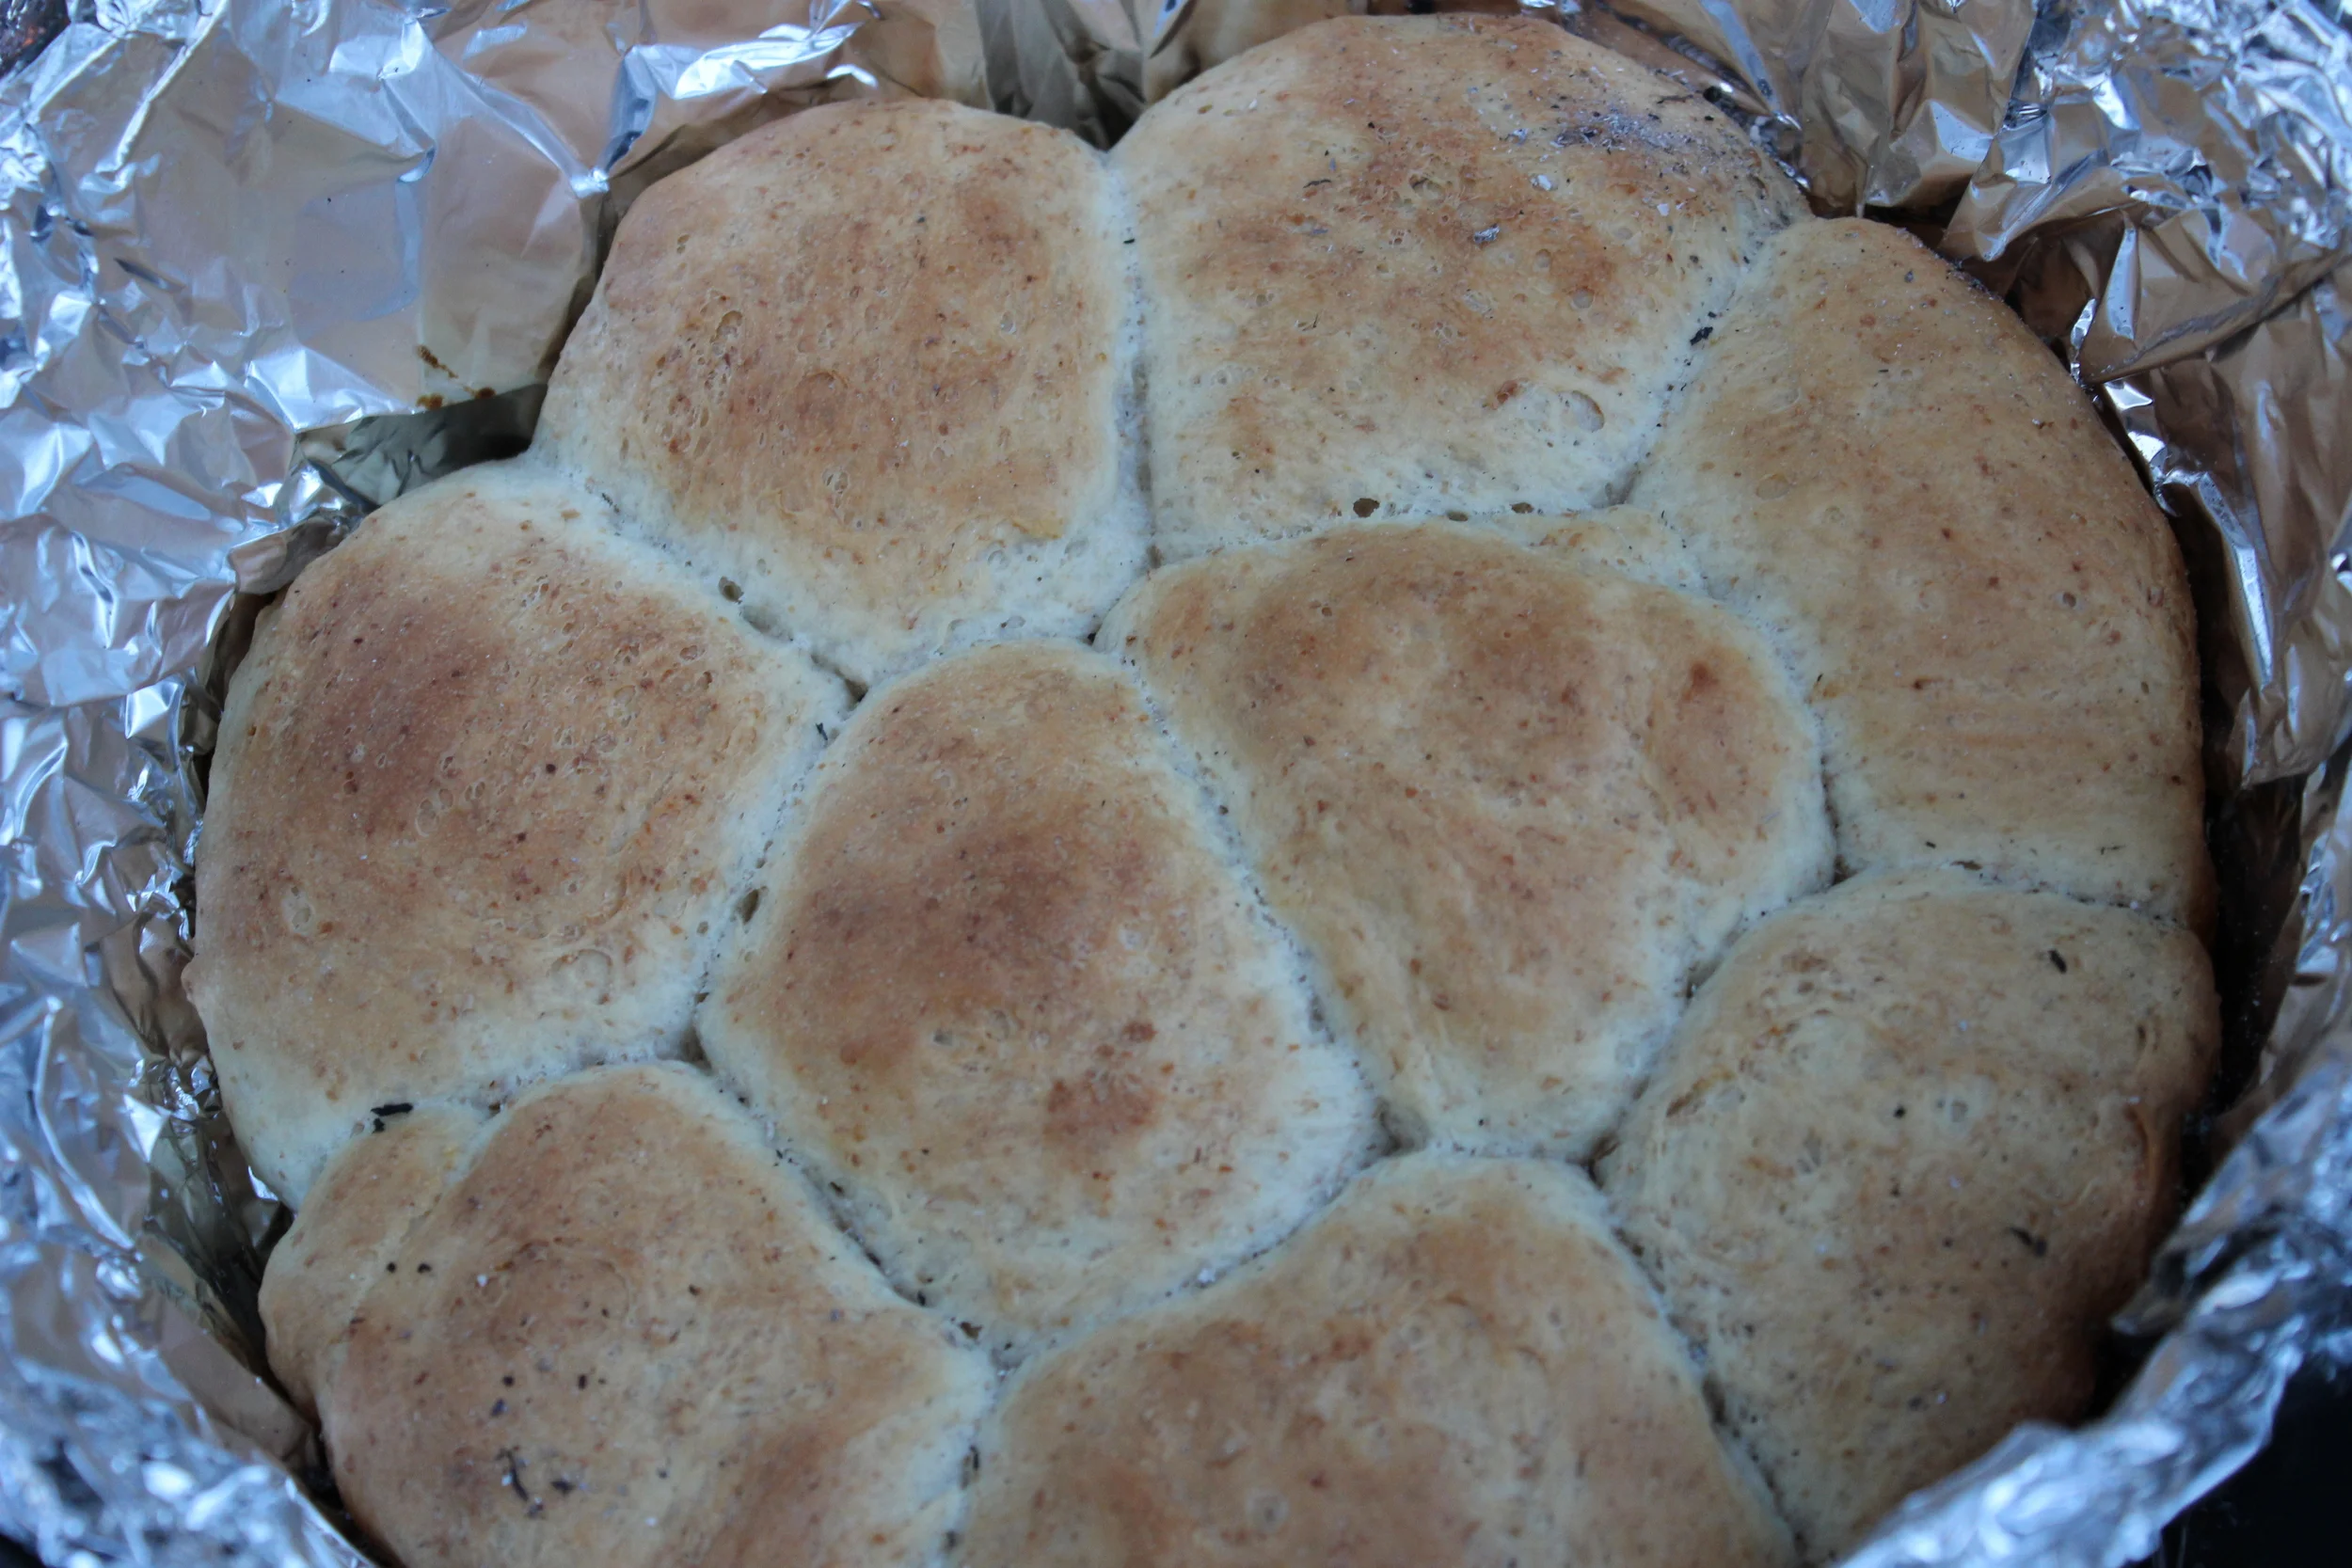
I had lined the Dutch Oven with foil in order to lift the rolls out easily. Once the Dutch Oven is removed from the fire...it's still hot and will continue to cook what is inside, hence my roll evacuation plan. Also I was surrounded by my hungry family who had partaken in this adventure and I wanted to gratify their appetites as soon as possible!
The side I thought had been scorched was only just. One roll had a half-dollar sized dark portion on the edge, but it wasn't even burnt all the way. I'd say one casualty is pretty good for a first try!
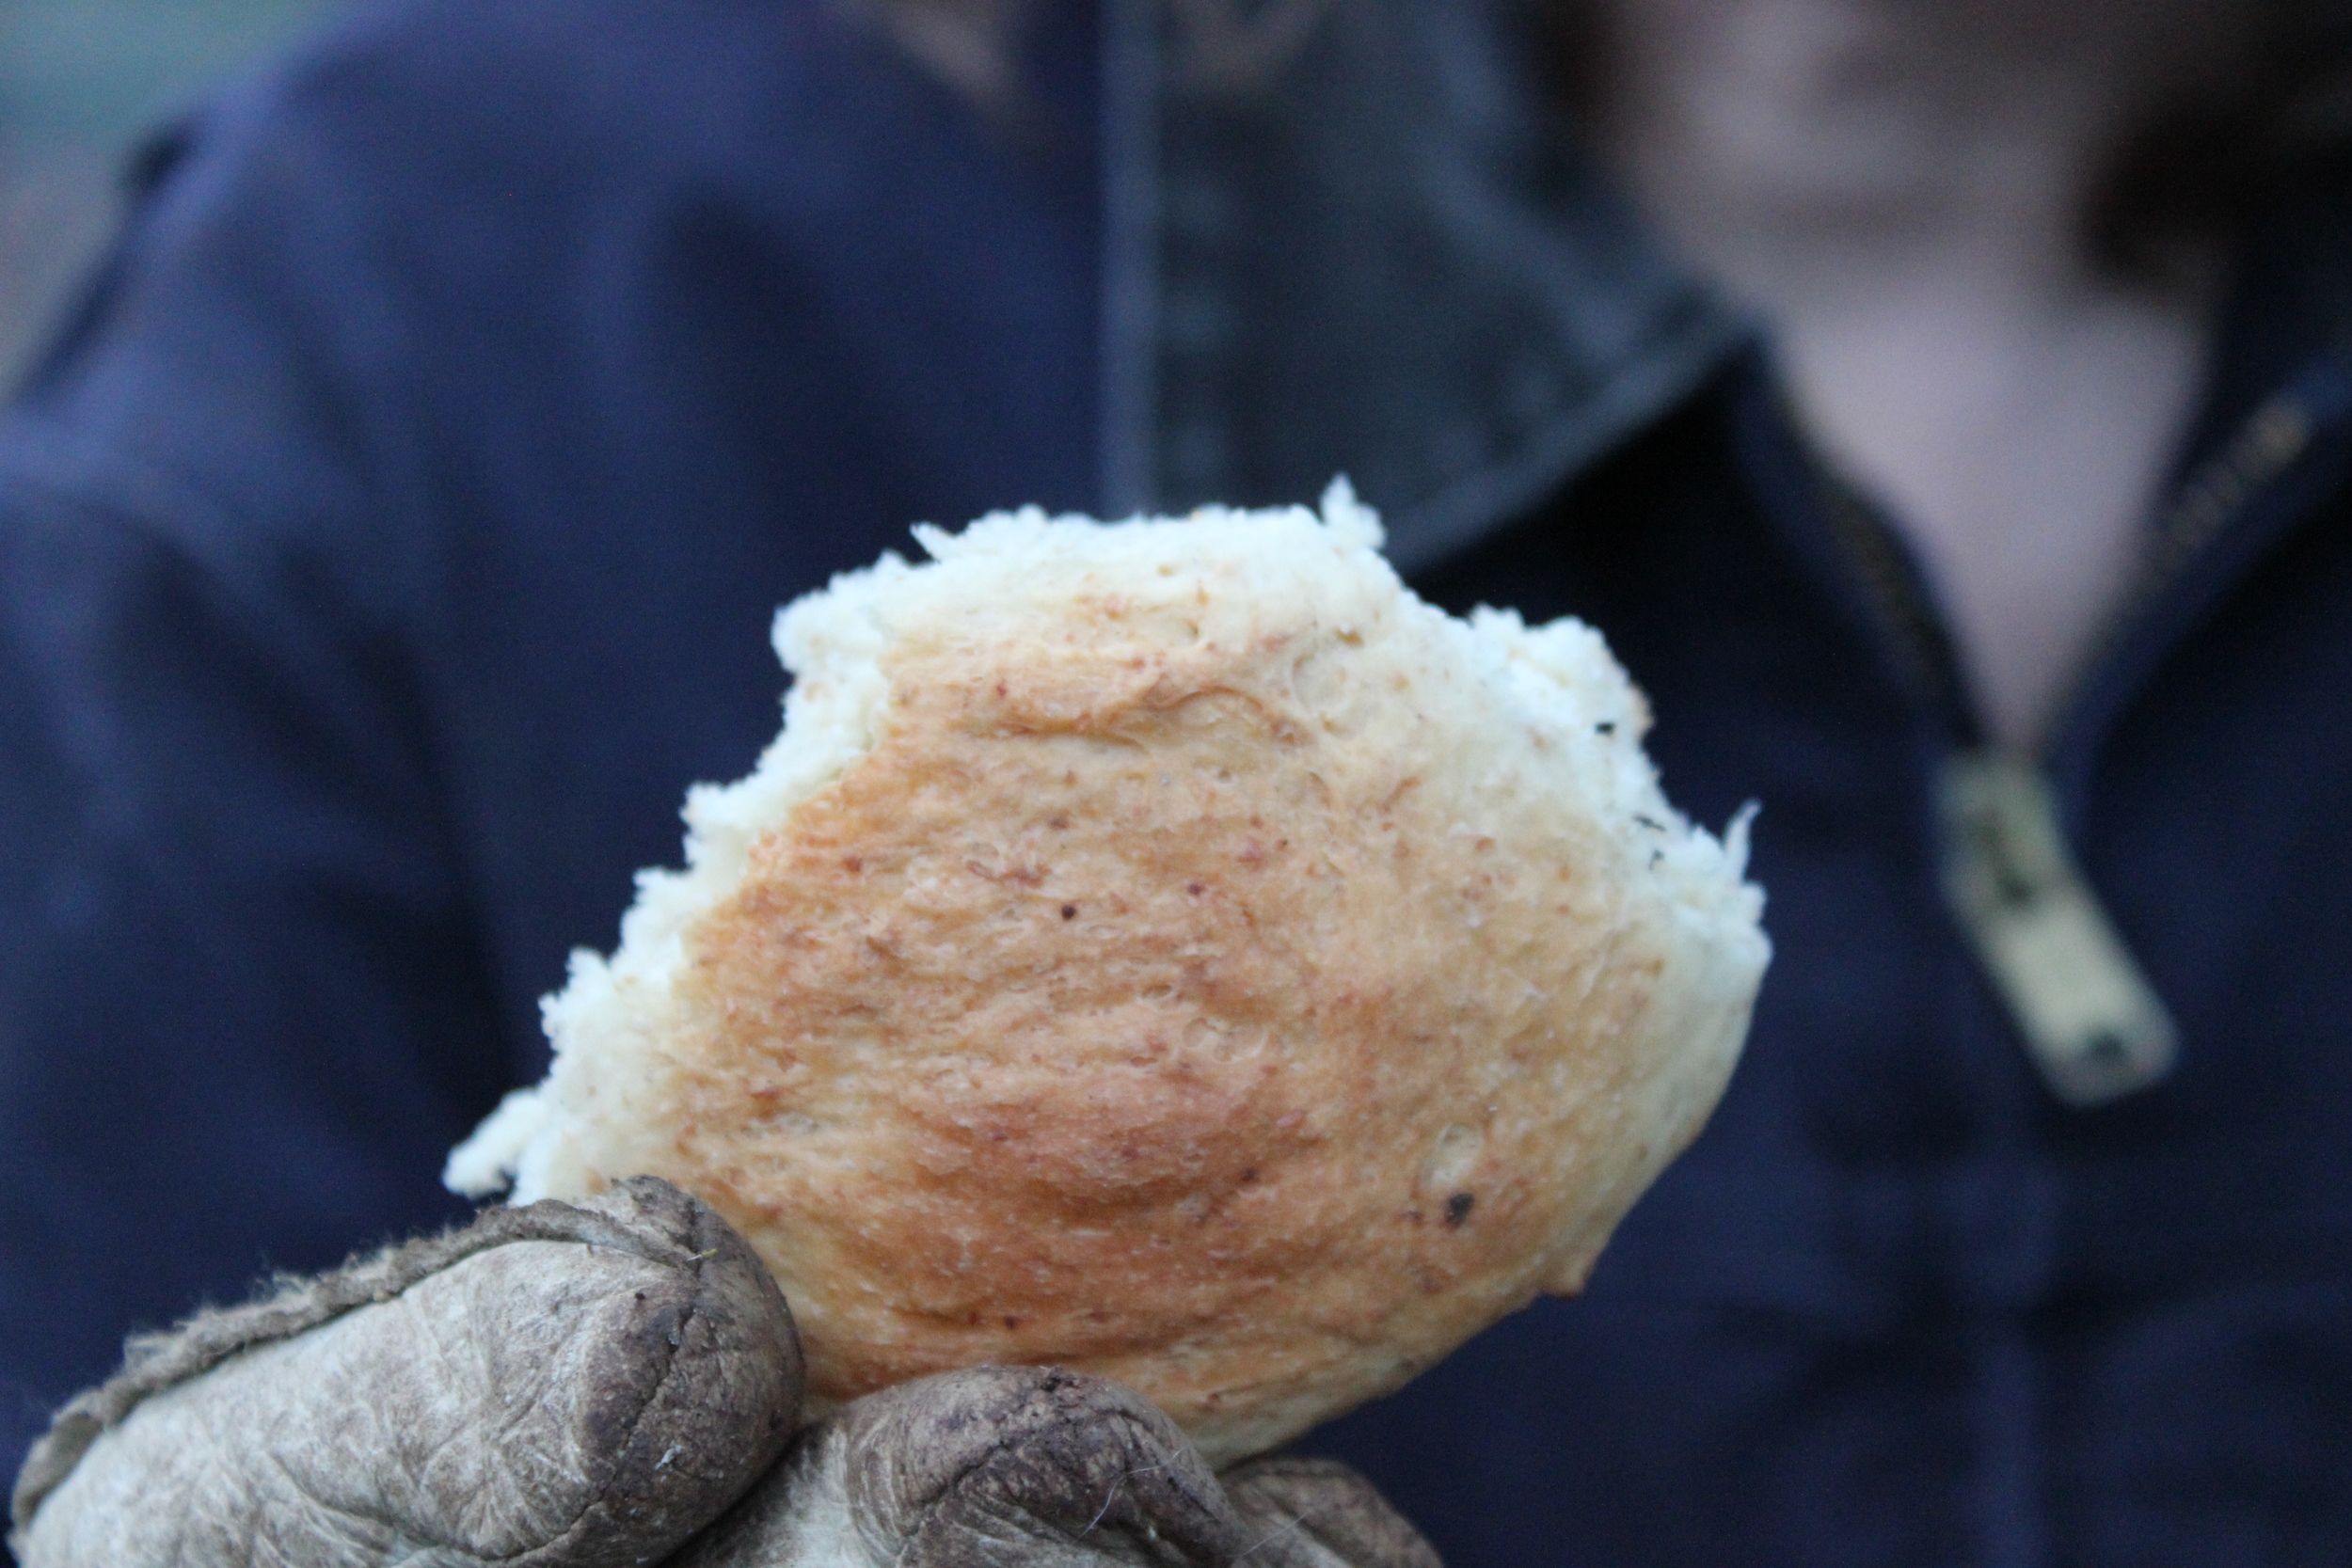
They were fantastic! Oh my. Eating hot rolls we just baked in the Dutch Oven on the fire as a family while standing in the fresh air on a beautiful Oregon afternoon was an AMAZING way to star the New Year! I'm very thankful for the support of my Ranch Family as I explore new skills and adventures. Pretty sure as long as I feed them yummys they will keep supporting :)
Now it's your turn! Go learn something new. Try the Dutch Oven or something else and broaden your horizons. It's a New Year. In 364 days, what do you want to have learned or accomplished? Don't wait. Make 2015 a year of learning and improving! Set a goal...you've got a little less than a year to reach it. GO!