PS tip

Girly Bobby Pins in 2 Minutes

I say this will take two minutes because that's how long it took me.  Not even kidding.  Timed it.  The only reason it took me 10 minutes to get this post up is because I stopped to eat a cookie.  

Don't judge.

So I'm going to be straight with you here.  I'm not the girliest of the girly girls.  Shocker.  Though I do like pink, lacy things, lip gloss, and dresses...I sit here writing this in blue jeans, a black sweater, wool socks, no makeup and a Marilla Cuthbert bun.  Sigh.  

Maybe I should add "femininity" to my New Year goals...it's not too late is it?

Modcloth Bobby Pins

Alright, well before Christmas I ordered a green dress on sale from ModCloth to wear for Christmas Eve dinner because I was not in a position to make one...and $15 for a brand new dress was not the hill I wanted to die on.  When the box arrived with the dress, there was a little package of these ADORABLE bobby pins with covered buttons.  So cute.  Great marketing scheme Modcloth.  

Mod cloth Heart Bobby Pin

They are awesome.  A plain Jane pony becomes quite a bit cuter with a little flowered heart holding back some bangs...or a whisp that escaped.

"How hard can that be?" I asked myself during a reflective moment.

Down the stairs I dashed to the button box {yes I have a button box full of randoms...that part wasn't minimized yet...remember what I said about judging} 

Button Bobby DIY

Button Bobby DIY

1} I fished out a button with a loop back...not the kind with holes in the face.

2} Grabbed a bobby pin and threaded the button on

3} Glued the little guy in place...held firm until dry {wire would work here too if it's in your craft stash}

4} Wear it out on the town...or doing dishes. It doesn't matter. 


PS TIP

Use covered button kits and bits of fabric to make a Button Bobby that matches an outfit.  Ta-da!

Also, these would make great gifts. 


Learning to Dutch Oven

New Year = New motivation to learn new skills.  Since I'm all about getting-back-to-basics, I thought I'd take my cooking skills to the next level and dry some Dutch Oven cooking.  

Dutch Oven by Bonfire

Lucky for me, my sweet sister-in-law has done tons of Civil War reenacting and learned from very skilled ladies how to cook meals on an open fire.  Having this wealth of of information right in the family was ideal for my venture of learning to use my Dutch Oven. 


PS TIP

If you have a family member or friend with a unique skill, take the time to learn it!  Chances are they will be more than glad to share.  This is how I learned to knit originally.  Just ask!  Instead of paying for a class or online tutorial, just ask someone who already knows!

Think of the possibilities!

Learn to spin yarn, make soap, plant an herb garden, take film photographs, hand quilt a blanket...the list is quite endless.

This is also a great way to start, build, or maintain relationships.  Showing someone you respect their skill in an area you know very little or nothing can go a long way.  Take a humble pill, admit you aren't an expert at everything and revel in the freedom of learning!


Dutch Oven Heaped in Coals

Here are the simple steps that led to scrumptious, fire cooked rolls.  Ours took approximately an hour to cook.

Any roll recipe will work.  This is the one my sis-in-law whipped up while I held her baby being a shameless Auntie.  I do not apologize. 

Follow your recipe instructions up to the part where you shape the rolls.  Don't put them in a pan, put them in the Dutch oven to rise.  Once risen, put the lid on and head for the fire.

1} Make a bed of coals.

This is done by having a medium to large fire, letting it burn down, and harvesting the coals.  My helpful brother took three shovel scoops full of hot coals and made a "bed" about 5 feet away from the main fire.  The coals were chopped up on a flat spot and allowed to cool for a few minutes so they were not glowing red.  Red is too hot and ABSOLUTELY NO OPEN FLAME! Flames will scorch your dish.  No fuego. 

Okay so we made the bed - Check

Evenly spread coals around the edges {Not touching the side...just radiating heat} - Check

One scoop on the lid spread evenly around - Check

Adding Coals to Lid

2} Tend the fire

You know in historical books or fiction about pioneers when they say "the women tended the fire".  That wasn't just oh-let-me-pitch-another-log-on-the-fire-so-it-doesn't-go-out.  No, that was a careful and continuous shuffling of coals around to create an even heat source to cook an entire meal.  While they had children to care for, mending to do, churning, meat processing for winter, gardens to tend...women we do not have it hard today.  We have it easy.  No matter how tough you think you've got it...it could be a much much harder life.

Rant over

So every 10-15 minutes I stuck my hand down by the sides of the Dutch Oven to make sure there weren't hot spots and cool spots and then shifted {or had my trusty brother shift} the coals around, sometimes adding to, sometimes backing some off.  Around every 20 minutes we added another scoop on the lid as the old coals died down.  Again...don't get over zealous and heap red hot coals all over.  Slow and even radiant heat is the goal.

Dutch Oven in Coals

3} Check the Progress.  

Alright, listen up.  The whole point of the Dutch Oven is to trap the heat and cook your rolls {or whatever dish you chose} like a regular convection oven.  Lifting the lid every 10 minutes to see the progress only lets all the heat out from the top so you'll have done edges and soft middles. It's like trying to cook a turkey with the door open. Don't over do the checking!  

Granted, it is kind of a guessing game, but wait until the rolls have been cooking long enough that you think they are close to done.  Scrape the coals off of the lid, blow all the dust off, and using a hook {or bent stick as in my case} lift the lid a tiny bit to inspect.  

My rolls were brown on the edges and one side was starting to scorch but the tops of the rolls looked doughy.  I pulled the coals back from the edges and added a heaping scoop of coals to the lid.

10 minutes later they were done!

Dutch Oven Rolls

I had lined the Dutch Oven with foil in order to lift the rolls out easily.  Once the Dutch Oven is removed from the fire...it's still hot and will continue to cook what is inside, hence my roll evacuation plan.  Also I was surrounded by my hungry family who had partaken in this adventure and I wanted to gratify their appetites as soon as possible!

The side I thought had been scorched was only just.  One roll had a half-dollar sized dark portion on the edge, but it wasn't even burnt all the way.  I'd say one casualty is pretty good for a first try!

Fresh Dutch Oven Roll

They were fantastic!  Oh my.  Eating hot rolls we just baked in the Dutch Oven on the fire as a family while standing in the fresh air on a beautiful Oregon afternoon was an AMAZING way to star the New Year!  I'm very thankful for the support of my Ranch Family as I explore new skills and adventures.  Pretty sure as long as I feed them yummys they will keep supporting :)

Now it's your turn!  Go learn something new.  Try the Dutch Oven or something else and broaden your horizons.  It's a New Year.  In 364 days, what do you want to have learned or accomplished?  Don't wait.  Make 2015 a year of learning and improving! Set a goal...you've got a little less than a year to reach it.  GO!

Hot Dutch Oven Rolls


How To Make a Simple Country Christmas Table

If you were like me this Christmas, you had a wonderful Pinterest vision of a stylish and elegant Christmas dinner table.  But if you are like me in that you didn't actually see if the idea was going to fit on the existing table and if the materials were in fact all in the house...then you may have come upon a serious road bump...kind of like those pot holes you never see until your knees have wound up where your chin should be. {You're welcome for the Suess-like poetry}

country Christmas table

Sometimes since I live on a ranch I just assume we have a giant farm table when reality is we don't.  We like to eat Christmas dinner in our "Big Room" with giant windows and the Christmas tree...not in the dining room which has a little round very ancient heirloom table. Nope, for the Big Room we have an old church table. You know the kind with the fold down legs and the pretend wood top and the round corners?  Yes that one.

It's really quite ugly all alone but is handy as a craft table or when we have guests over.  BUT my Pinterest idea was a barn board runner down the center with greenery and matching votive jars.

A) The barn board is too wide for the center...the plates will not fit on the edge without a 4" lip.  Bad deal when using the good china.

B) All my greenery that had been cut and I had saved for this moment was no where to be found. The men of the ranch assumed I did not need it anymore and burned it all.  

C) Those votive candle holders had RED candles burned halfway down into them and were stuck like a little boy boot in not set concrete. Not the white light dream I'd imagined.

Now what.

My Dad was quite sweet...he came out to the Big Room to see how I was doing and found me, hands on hips, looking mighty focused on a table with one board and a plate in haphazard places.  He kindly looked at me and promptly left the room.  He knows not to break my focus in desperate times.

country candle centerpiece

New plan.  I went to my cedar chest and pulled out every white linen piece I'd inherited from my Great Grandmother's on the ranching side.  Table cloths, runners, napkins, doilies, dresser toppers, pillow shams, bits of tatted lace...Everything was pulled out and hauled to the Big Room.

Next I found every mid-sized jar, sugar and creamer set, measuring cup...anything antique, glass, and small.

Basically I did reverse of my original plan and with more candles.  

PS TIP

When in doubt, put LOTS of candles out.  Candles look cozy and can hide a multitude of flaws.  They create a wonderful aroma and soft light even makes a bad makeup job look good.  Candlelight is your friend.

The centerpiece is a mirror tray on a pedestal with...more candles.  Tapers in the center add height and bring more light to the dimly lit room.

China Place Setting

Lot's of candles did I put out,

Because that's what country's all about!

{Another rhyme for thine pleasure}

Silverware on Barnboard

For those of you who are 4-H table setting alumni, you would be horrified that I did not match the fork handles exactly one-and-a-half inches from the edge.  Nope...and the 4-Her inside me trembled as I ventured far from my roots and matched the tines instead.  Somehow I thought the design was more interesting that way.  Don't hate me forever!

china setting on barn boards

There you have it.  Nothing Pottery Barn about this table setting, just all the little odds and ends we've had around for ages displayed in a new way.  

Hope you're having a Merry Day After Christmas!

Busy Times = Easy Food

Ah the Holidays.  It's not Silver Bells I hear that tell me it's Christmas.  No it's the list of Christmas cards I haven't sent,  the decorations still in boxes in the rooms where they should be gracing the walls, those random sweet Pinterest DIY gifts that eat at your soul each day they go unmade {they seemed like a good idea at the time}


Reality is the Holiday's can be hectic! It's not L.L. Bean plaid pajamas, sipping peppermint tea by the fire all season.  There is a lot to do and we women can get eaten alive by it.  


One of the hardest thing to do when things are busy is make a healthy, clever meal.  Papa Murphy's Pizza just sounds so good when you're up to your elbows in tinsel and Christmas socials.


Here's one scrumptious recipe I found on a particularly busy day that saved my bacon and filled my family with healthy things! 


Crock pots make my life much easier.  Chuck a bunch of ingredients at it and the trusty little guy makes dinner for you!  It's like Mrs. Patmore of Downton Abbey.  You don't know how she works and dare not ask questions...just enjoy the food!

Seeing as how I'm feeding my very manly Father.  A vegetarian meal was not going to suffice.  Been down that road...it didn't end well.  SOLUTION! I added a pound of our home grown natural ground beef.  That bit of beef flavor made a world of difference in the happiness of the ones around my table.  


I would suggest though...not being shortsighted like I was in one point in particular.  Don't use chicken broth when you are adding beef.  It didn't taste bad...but I feel like one meat flavor is enough.

Quinoa is tricky.  Sometimes it's hard to cook fully and sometimes it's altogether the blandest bland food that ever was bland.  I've only been cooking with it for a handful of months and some days are success and others...well...bland.  

PS TIP

One tip I've learned when cooking quinoa is LEAVE THE LID ON! Don't peek at it over and over and let all the moisture and even pressure out.  Let it be until the timer goes off and even then...let it rest off of the heat source for a few minutes.  

Another tip is to not stir it with a spoon.  Don't even bring a spoon to the quinoa party!  Fluff it with a fork.  Now this is tricky if you use non-stick cookware and don't want to scratch the coating...I understand completely...but there are wooden forks out there that can save the quinoa from a spoon inflicted demise.

Aaand here we are all crock pot ready and 6 hours before supper.  What a relief on the brain, knowing dinner is taken care of.  One less thing to stress about.


I would encourage you {and myself} to take time to enjoy the season.  That sounds so cliche but really...make some tea...put on something plaid and listen to a Christmas album and ENJOY the fruits of your hard work and endless lists! 


North to Alaska!

Well after the baby boy that is positively precious arrived, I packed my bag and zoomed off to Alaska to visit family and ski. I had intended to go before boy was born but he decided to be early and keep everyone on their toes! 

So here I am in the frigid North, the Last Frontier, the land that Robert Service wrote many a ballad about. 


image.jpg

Yes that is correct. -1.5 degrees. 


On the road sometime I feel like my brain gets behind. I've so many ideas or thoughts or a marketing strategy for my Dad's ranch or a pattern idea for a clutch out of old wool or a new herb garden skematic...how do I remember the gems to be used later when I'm going, going, GONE?! 


PS TIP

Keep a journal. Not a "dear diary" journal or even one with deep content regarding life and eternity. A scratch book. One that can be beat up, pages torn out, things stapled in, one that can go everywhere and handle everything.  


This is mine. 

image.jpg

Picked this Eco-recycled-earth friendly book up at a book shop in Prescott, Arizona. 


image.jpg

I took notes while watching "Band of Brothers" to use to teach leadership.


image.jpg

Ah and here is the map I drew for my Sister-in-law's baby shower. I knew the venue and planned the room and decor from 1,000 miles away by scratching it out on my journal. 


This is guy goes with me everywhere so I have the opportunity to use my ideas or share them at later times because we all know how hard it is to remember that keen idea on the spot when you need it.  


Write. It. Down! 


Enjoy your warmth wherever you are and Happy Monday!

And then it was Saturday

Have you ever had a week where you were trying to catch up on all the things you missed the week before yet no matter how much you accomplished the to-do pile seemed to grow?

That's my week in a rather paper strewn nutshell.

Returning from the hospital and NICU duty and food runs to my little home office...I found myself quite buried in laundry, bills, iPad updates, dirty floors, messy mail folder, prescription pick-up, meetings...GAH!  

This was a wretched beginning.


{PS Tip}

Make your bed in the morning.  Just do it. Even if your room, house, yard is a mess. You've no idea what the day may hold.  Coming home from a trip, the hospital, or just walking upstairs after supper with the fam...the calming visual effect of a nicely made bed and the restful joy of crawling into that well made bed is beyond compare.  Laundry may be scattered, desk may be heaped, but that place of rest and recharging is ready for you.  Pretty sure that made bed was the only thing that kept me from crying overwhelmed tears upon my return home was seeing my cozy cloud bed all tucked in for me.


Moving on...

My organized self developed an eye twitch just looking at my desk.  Ugh.  How did neat little me end up with this disaster after just a weekend of absence?  

Instead of starting at the top of the pile and working down, I figured visually seeing all the paper things that needed to be addressed was better. 

This is close to the end of the week...I dare not show how it looked on Monday

This is close to the end of the week...I dare not show how it looked on Monday

ENTER: Old second hand bulletin board painted with chalkboard paint.  Using pushpins, I stuck every bill, sticky note, receipt, insurance card, stencil, safety pin {my random findings knows no bounds} to the board. Put a calming verse at the top, my budget and to-do list on the bottom and then...starting with my now clear and calm looking desk, I pulled one thing at at time down, dealt with it, and moved on.  Ah the joy of no clutter!

Having my to-do list displayed aesthetically and where I could see it easily helped me make use of my time instead of pawing through stacks to find that random sticky that told me that vital insurance info or knitting needle size or meeting time.  Less pawing is less stress!

Here's hoping your week was productive and absent of stress!  


That time I started a blog...

...and my sister-in-law's water broke 6 weeks early.

I'm single, never had a baby, but have been beyond ECSTATIC at my chance to be a real auntie!  My oldest brother lives far away and I never see his kids but my second oldest bro lives just down the road in the same tiny town in the Oregon boondocks as I do.  HURRAH!

Anyway I had this great plan of starting a blog, creating great content in a super organized fashion because I am super organized and live for organized things and sharing stories.  BUT that was not to be, at least for now.

Meet my precious nephew Sawyer James who just couldn't wait to get out into the world and make adventures happen!

SawyerJames

He is only seconds old right here...I'm amazed how clean he was.  As someone who grew up and currently lives on a ranch I've seen hundreds of calves be born and they are covered in slime.  This guy wasn't so that was good for my queasy stomach!  

We only were able to see him for a few moments before he was whisked off to the NICU and plugged into a thousand machines. 

Sawyer James NICU1

His Mama was taken immediately to surgery and his Dad wanted to be with her so I got to watch over the little man.  He has a strong grip!  Little fella's lungs aren't quite ready to breath on his own so he is getting mechanical help, and he's attached to many wires to ensure he does OK...but he's still perfect to me.

There you have it.  It's not a tutorial on knitting or a book review but it's what is happening now and I wouldn't have it any other way.


{PS TIP}

Even if you aren't the mother, if you are part of the "going to the hospital" party then be sure to have an overnight bag that can easily stretch into a week or two bag. Here's mine.

hospitalkit.jpg

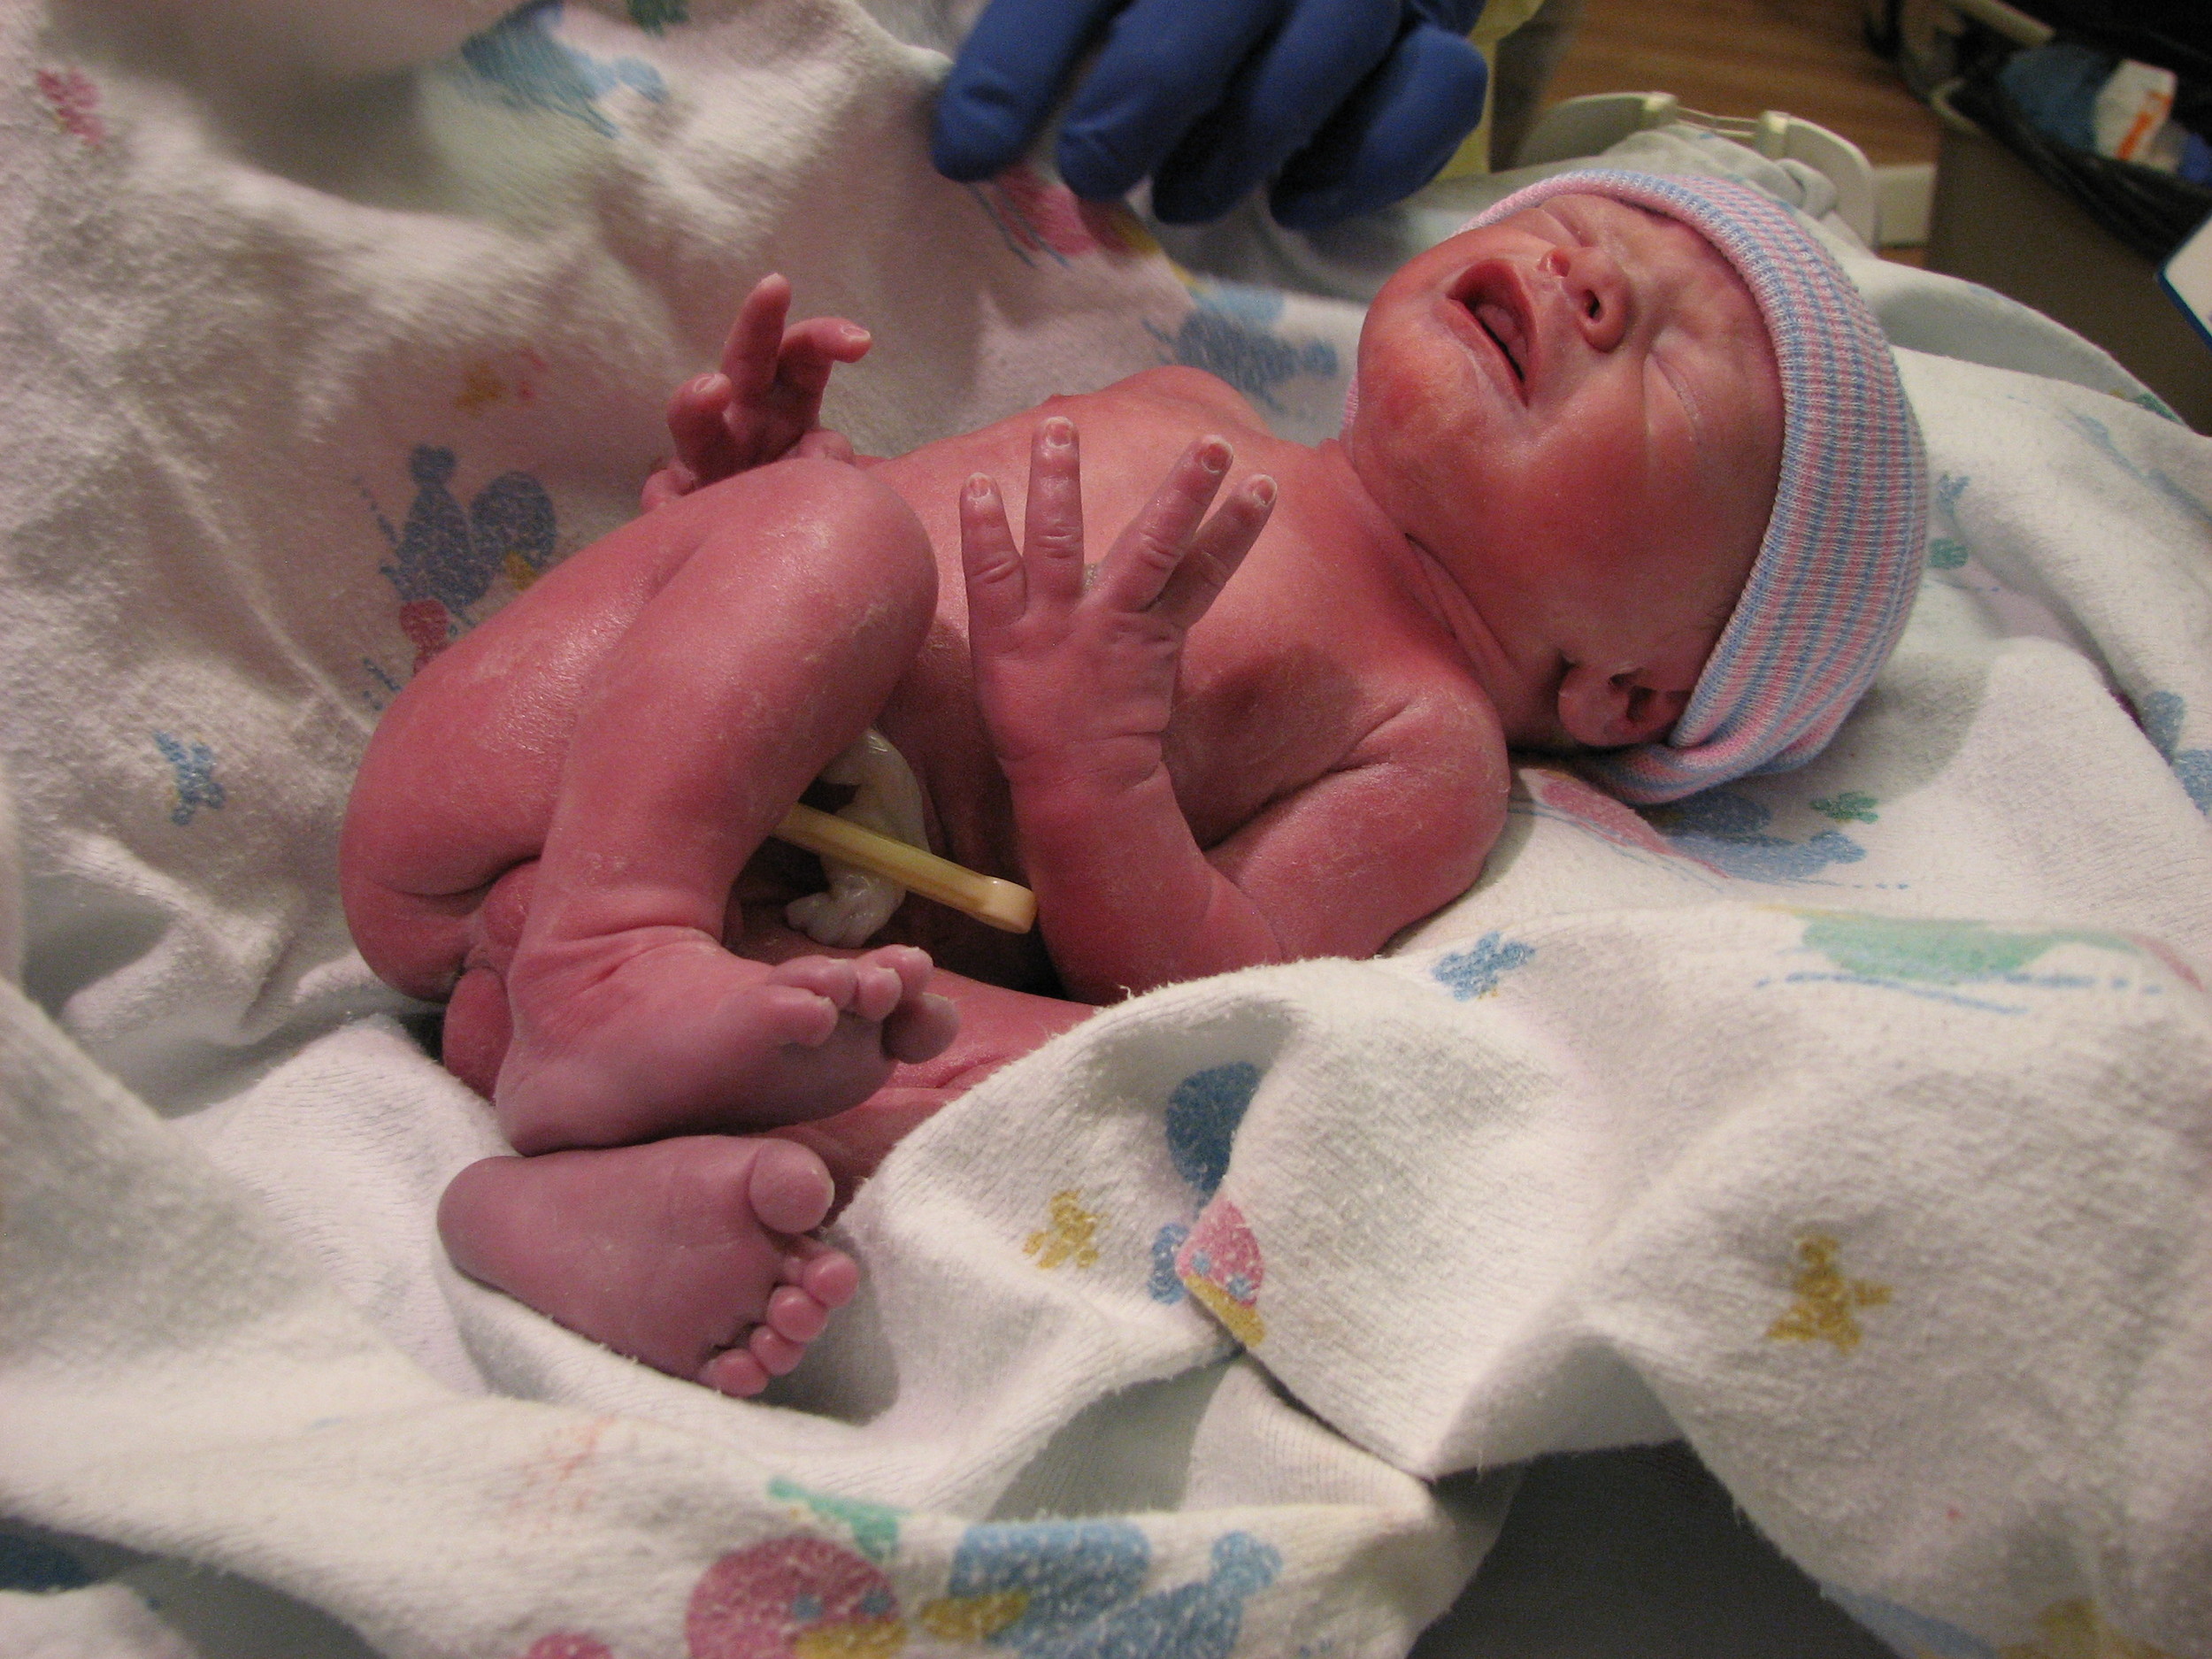
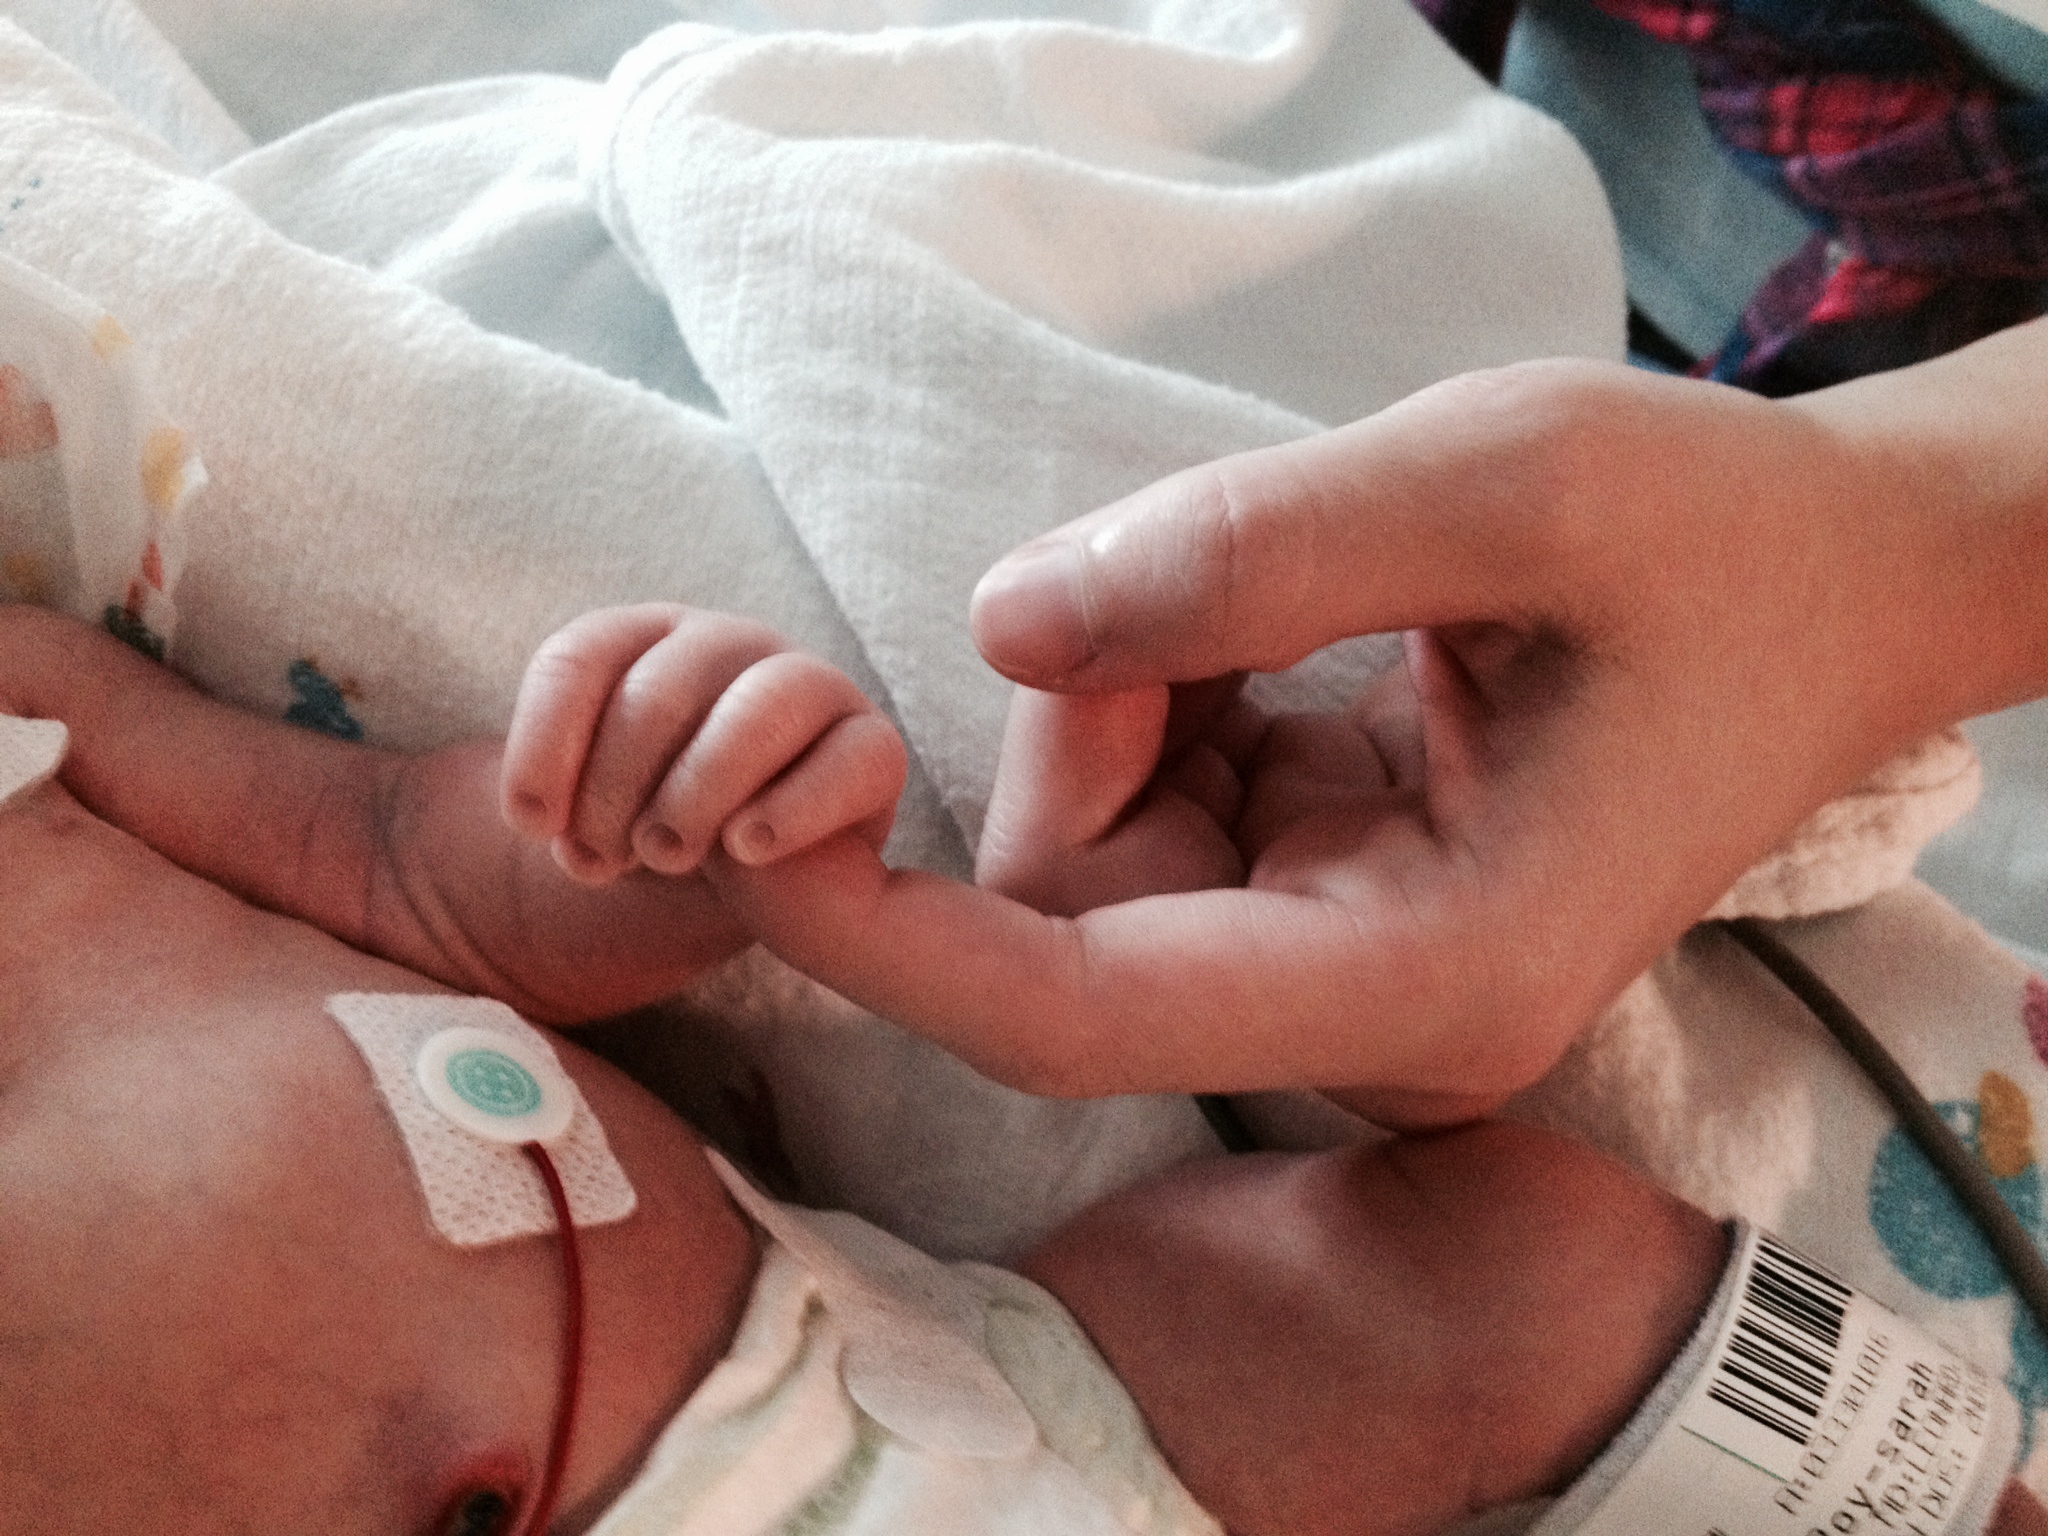
I realize this is horrible quality photography right there but keep in mind I was throwing this together and still had a 2 hour drive to the hospital ahead of me.  

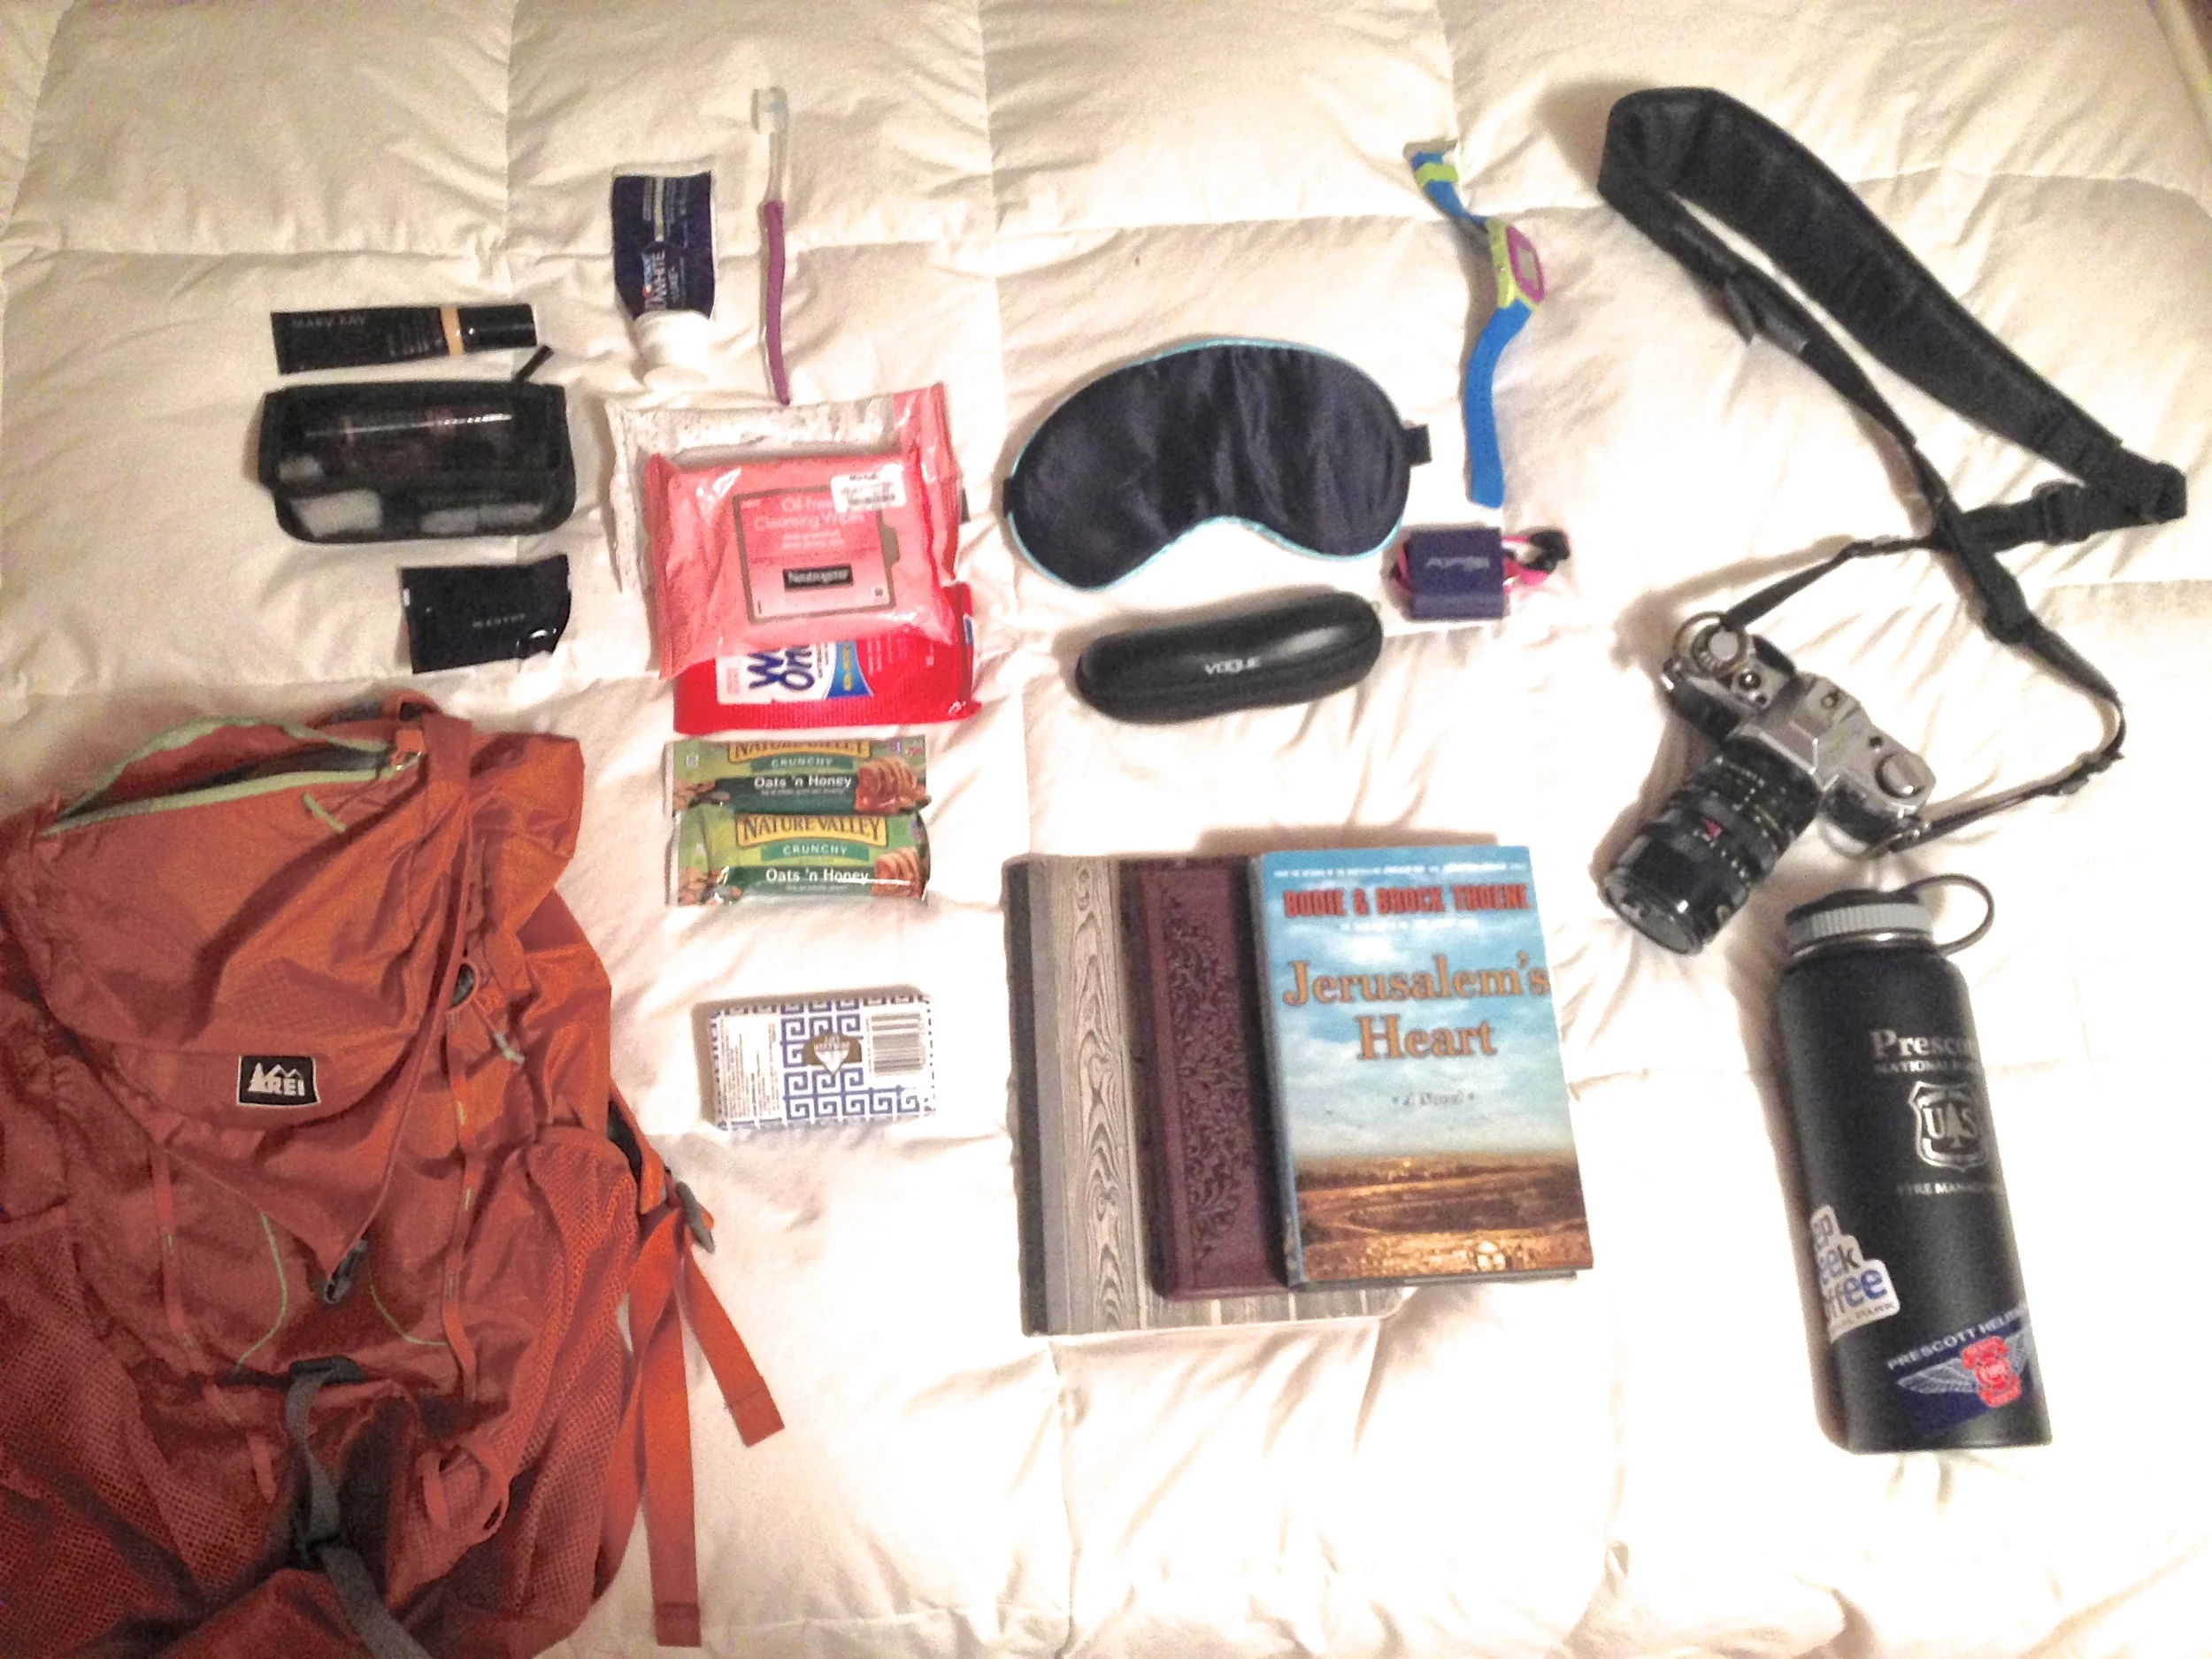
Bag - I chose my REI Flash 22 pack. This pack was bigger than the handful of things I was taking...but who knew that what was meant to be an overnight would turn into a week?  Having the extra space to stuff my jacket, extra shirts, extra necessaries was such a huge help!  Also it being a backpack was much handier than a wheelie suitcase because it could be hung up on a hook or fit in a locker and my hands were totally free to help as we moved from room to room to room.

Things to do - Three days of labor isn't terribly exciting but when you HAVE to be there for when things do take off, it's nice to have some books to read, videos downloaded on your phone {because hospital TV is hard to get into} I took my idea journal, Bible, and a novel I had started.

Hygiene - If you stay at the hospital, a hotel, or a friend's house, there is something vastly refreshing about using your own products to get freshened up.  Also hospital and hotel products dry out hair and skin so badly yet somehow after a few hours you manage to be more oily and sweaty than ever.  Gross.  I brought my own little face wash, moisturizer, CC cream, travel mascara {waterproof}, lip balm, toothbrush, toothpaste, face wipes {those awesome grapefruit ones}, and a shampoo.  I would also add a razor...lets just say things started to prickle after awhile.

Comfort - I brought a sleep mask and earplugs so when it was my turn to sleep I would have a better chance of actually getting some rest.

Camera - Duh...don't want to miss anything!

Watch - Sometimes I couldn't find a the hospital clock quickly and my hands needed to not be wrapped around my cell phone.  Having a watch to time contractions, see if it was time to get food for everyone, or when the pitocin was going to be cranked up again.

Wet Ones - because hospitals aren't always that clean

Snacks and Water - It's so easy to get dehydrated and forget to eat until all the sudden you are crashing physically.  Don't be that guy.  Take granola bars, pay attention to the time, and drink Drink DRINK!

As far as clothes...go with comfort.  I wore sports clothes which is kind of a cardinal rule of mine NOT to do...but let's face it...these few days or weeks will be a marathon so dress accordingly!

Personal Conduct - You would not believe {or maybe you would} how selfish people can be when visiting in the hospital.

 I wasn't the one in labor so to me...what I needed or wanted didn't matter.  I was there to make sure my brother had everything he needed to make sure his wife had him right there to support her.  Whatever had to be done for him to be able to help her...I did.  Let's just say walking 2 miles with 10 boxes of IHOP food in grocery sacks isn't a piece of cake but was totally necessary.

BUT when people came in to support...it was on their terms, their schedule, they stayed as long as they wanted even if Mama was hurting or sleepy or had to pee again or whatever.  How rude.  If you visit someone in the hospital...don't go at your convenience.  Go at theirs. Call.  Ask.  Find out what is best for them.  If no visit is best for them then DON"T VISIT!  No matter how much you want to see them, sometimes it's best to not be there. Send flowers or a basket or card.  

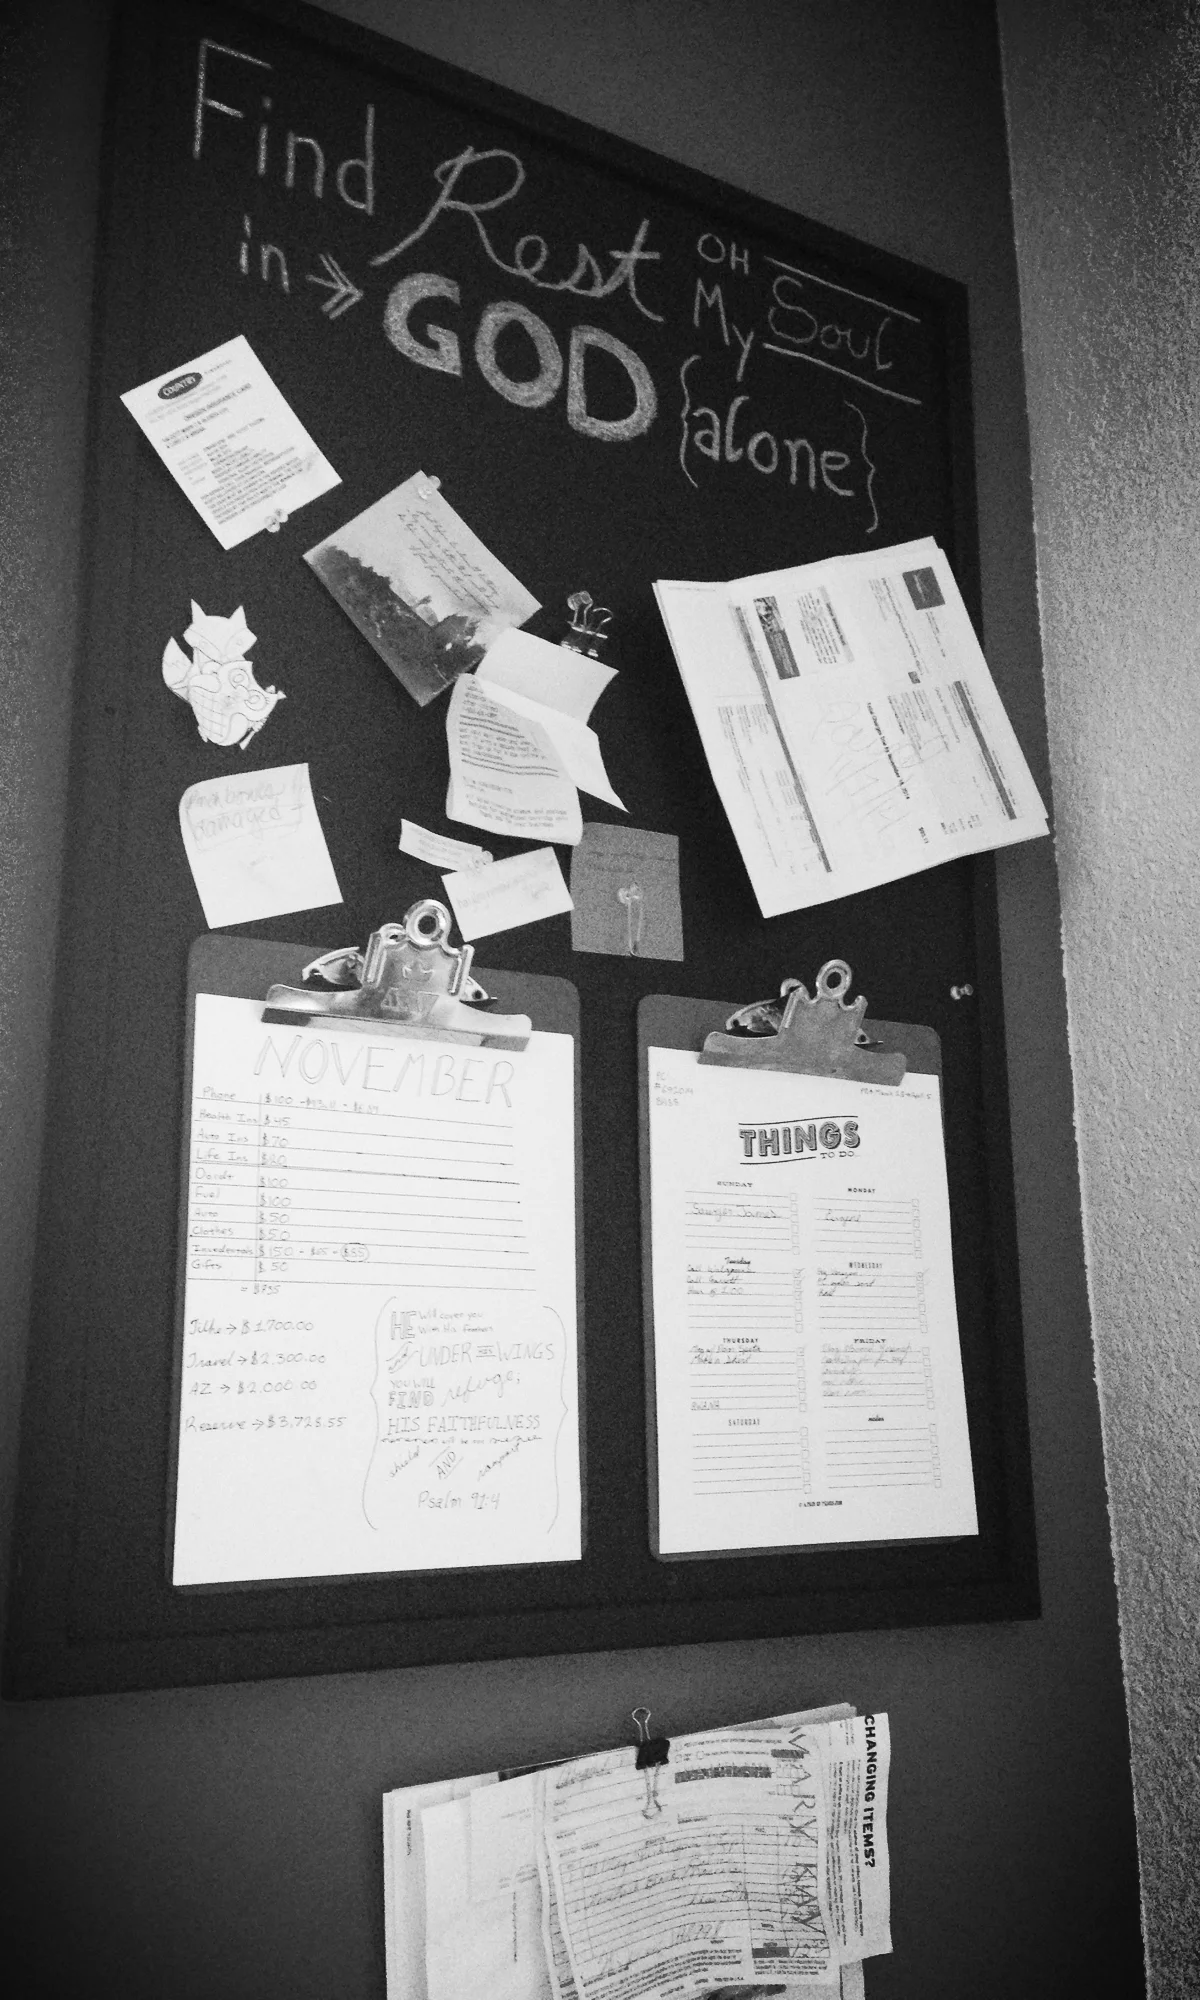
Maybe it's because I'm an organizer but I see things in a logical chain of  events based on what the person or situation requires.  I've been a wedding coordinator and event planner because sometimes I see what other's don't.  Anyway...don't be that person that is well intentioned but ruins a day by being blind to another's needs.